Introduction
This documentation is last updated on 6 July 2017.
Thank you for purchasing Kiddie WordPress Theme. If you have any question that is beyond the scope of this documentation, Please feel free to create a support ticket using Our Support Site.
Disclaimer:
We offer premium support for our theme customers. Our support covers all Kiddie Theme core features and included plugins. We followed WordPress industry standards when coding Kiddie so adding extra plugins should be easy although we cannot guarantee our themes will work properly with all third party plugins and server environments. If you plan on adding numerous plugins to this theme then please note, we cannot facilitate support for any conflicts that might arise with this theme's default functionality. Kiddie WordPress theme is presented as it is.
ThemeForest Item Purchase Code to Signup on Support Site
Please visit this knowledge base article to learn about how to get item purchase code from ThemeForest to signup on our support site.
If you like this theme, Please support us by rating this theme with 5 stars (How to rate?)
Install Theme
In start you must have a working version of WordPress already installed. For information in regard to installing the WordPress CMS, please see the WordPress Codex Installing WordPress
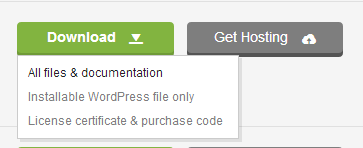
Once you have a working of version of WordPress, you need to download All Files and Documentation from ThemeForest and extract the downloaded zip to get various files including kiddie.zip.
Install Theme Via WordPress Dashboard
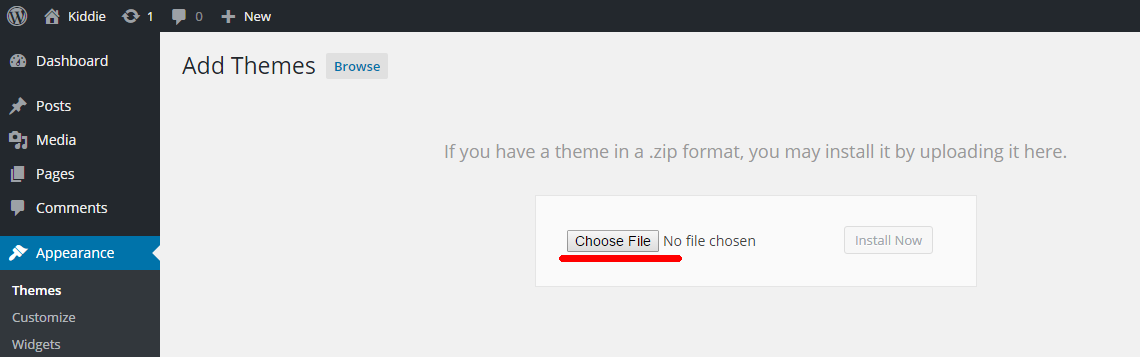
- Go to 'Appearance > Themes' section
- Click 'Add New' and select the 'Upload Theme' option
- Choose the kiddie.zip file and press 'Install Now'
- Once the child theme is uploaded you need to activate it.
If you face any problem during upload through dashboard, please upload the theme using FTP as guided below.
Install Theme Via FTP
- Access your hosting server using an ftp client like FileZilla
- Go to the 'wp-content/themes' folder of your WordPress installation
- Extract the kiddie.zip file and put the kiddie folder in 'wp-content/themes/' folder
- Go to 'WordPress Dashboard > Appearance > Themes' section to activate the child theme
Install Plugins
After you have installed and activated the theme, there'll be a list of recommended plugins at the top of the WordPress dashboard. Please install recommended plugins.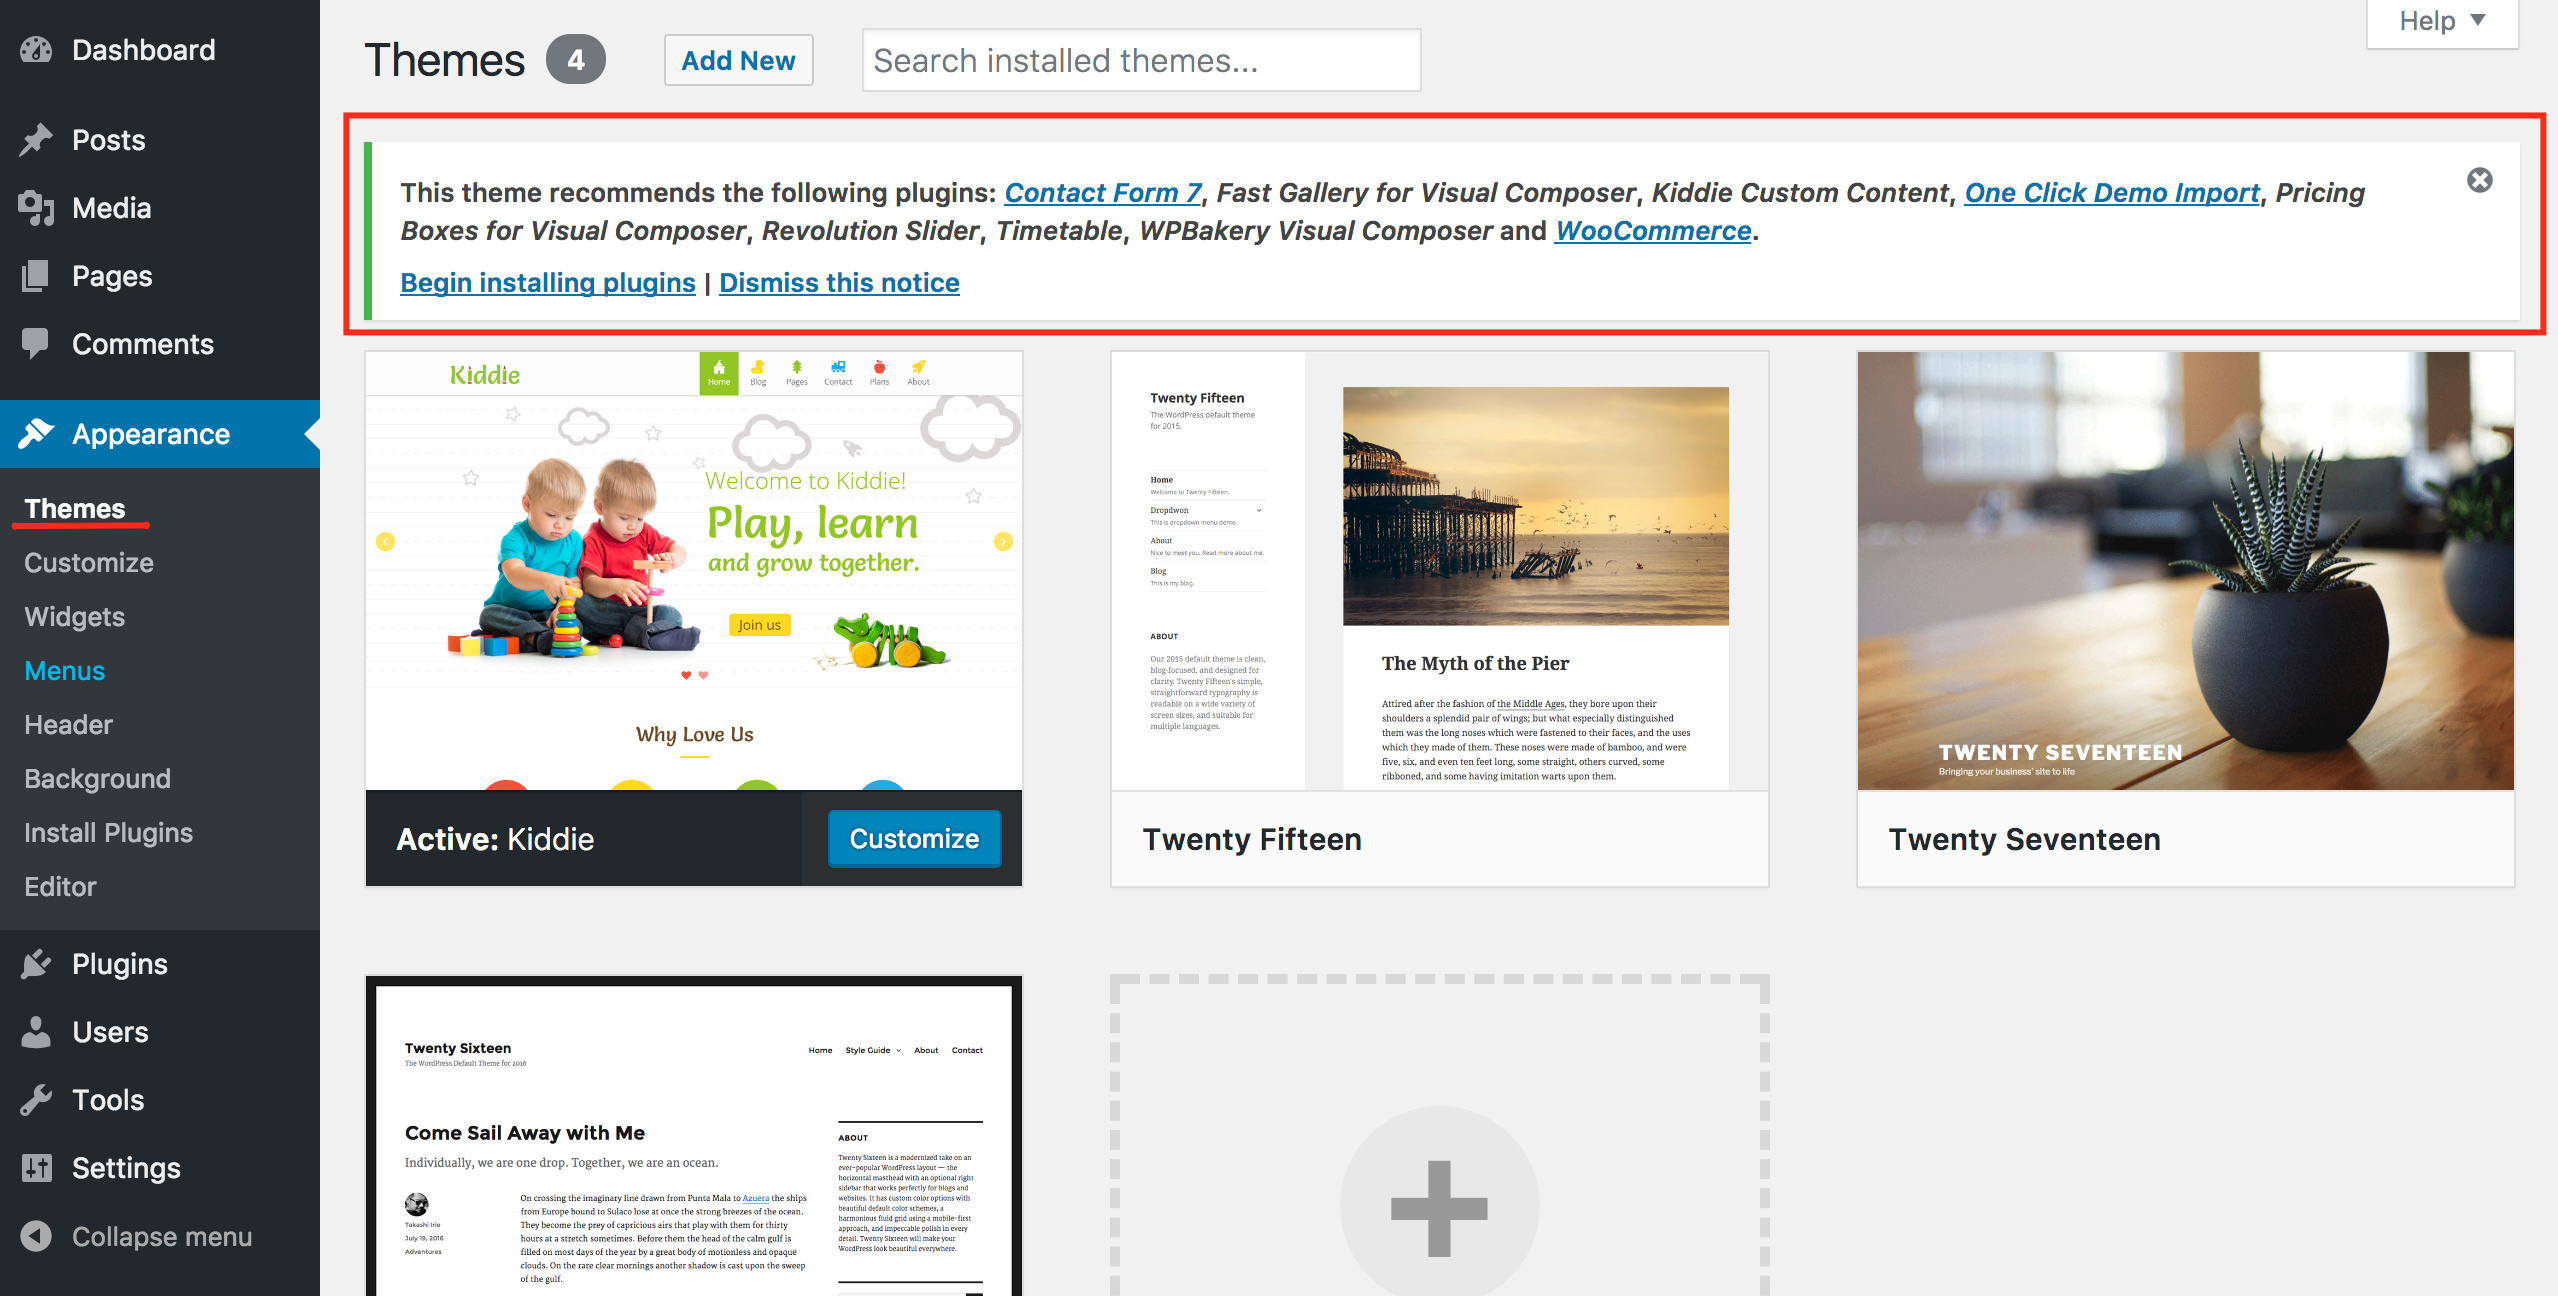
If you already hide it out, you can go to 'Appearance > Install Plugins' section instead.
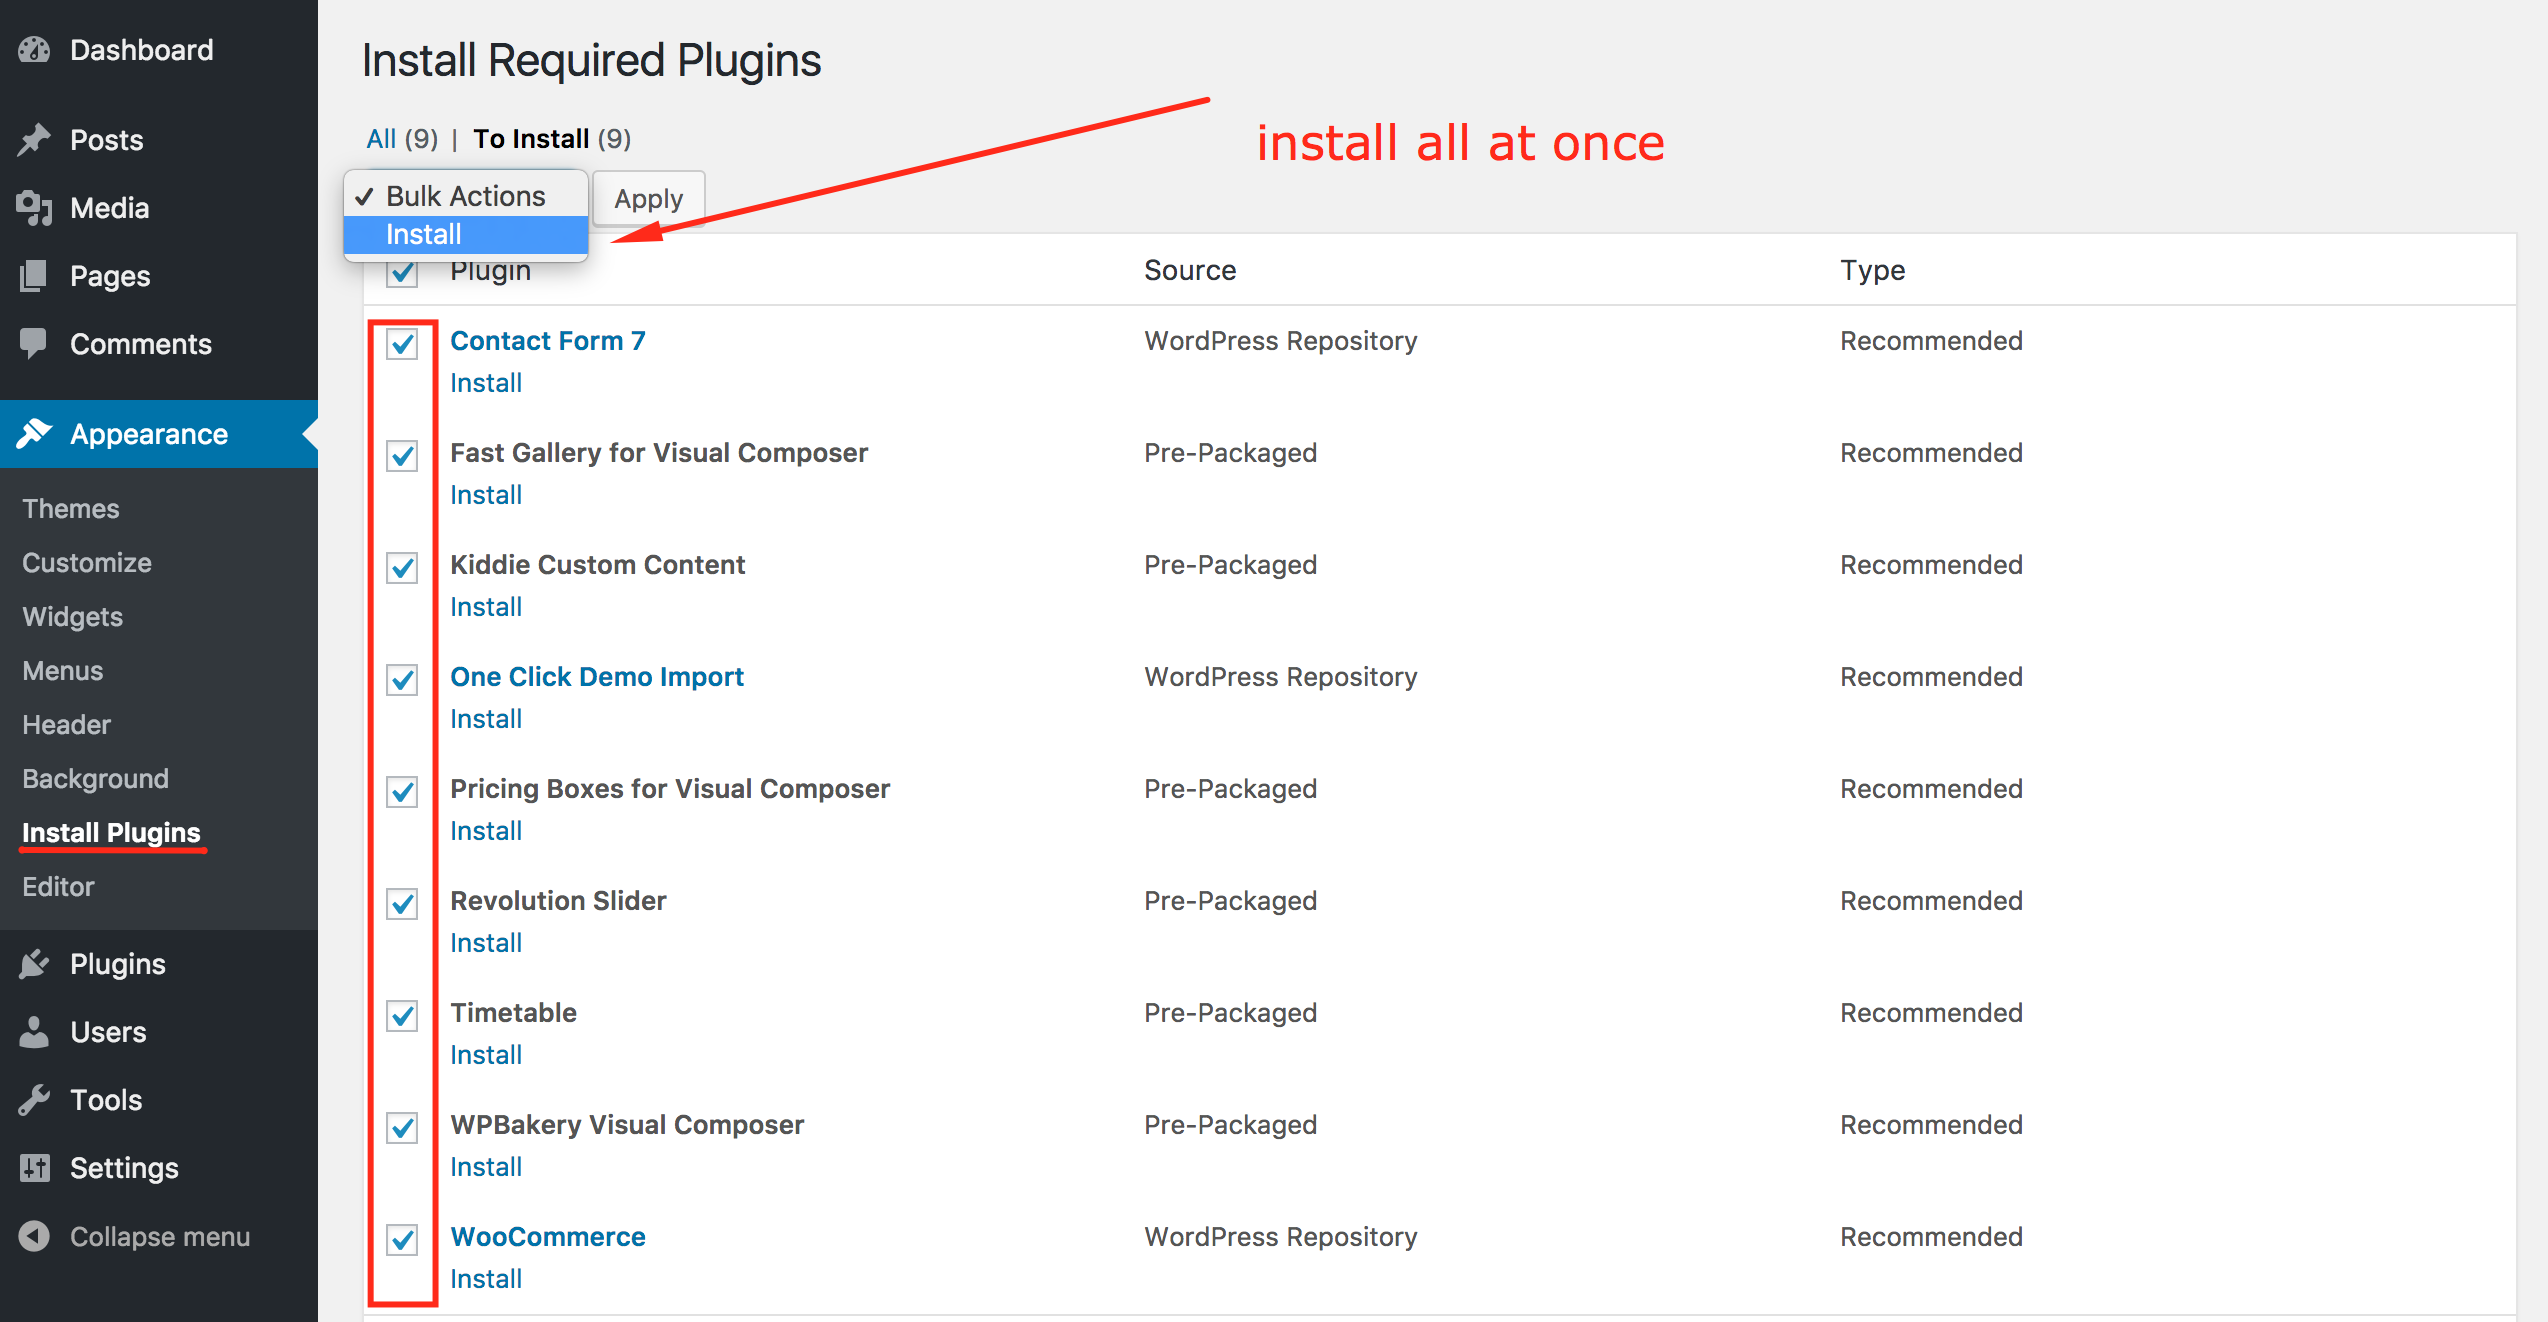
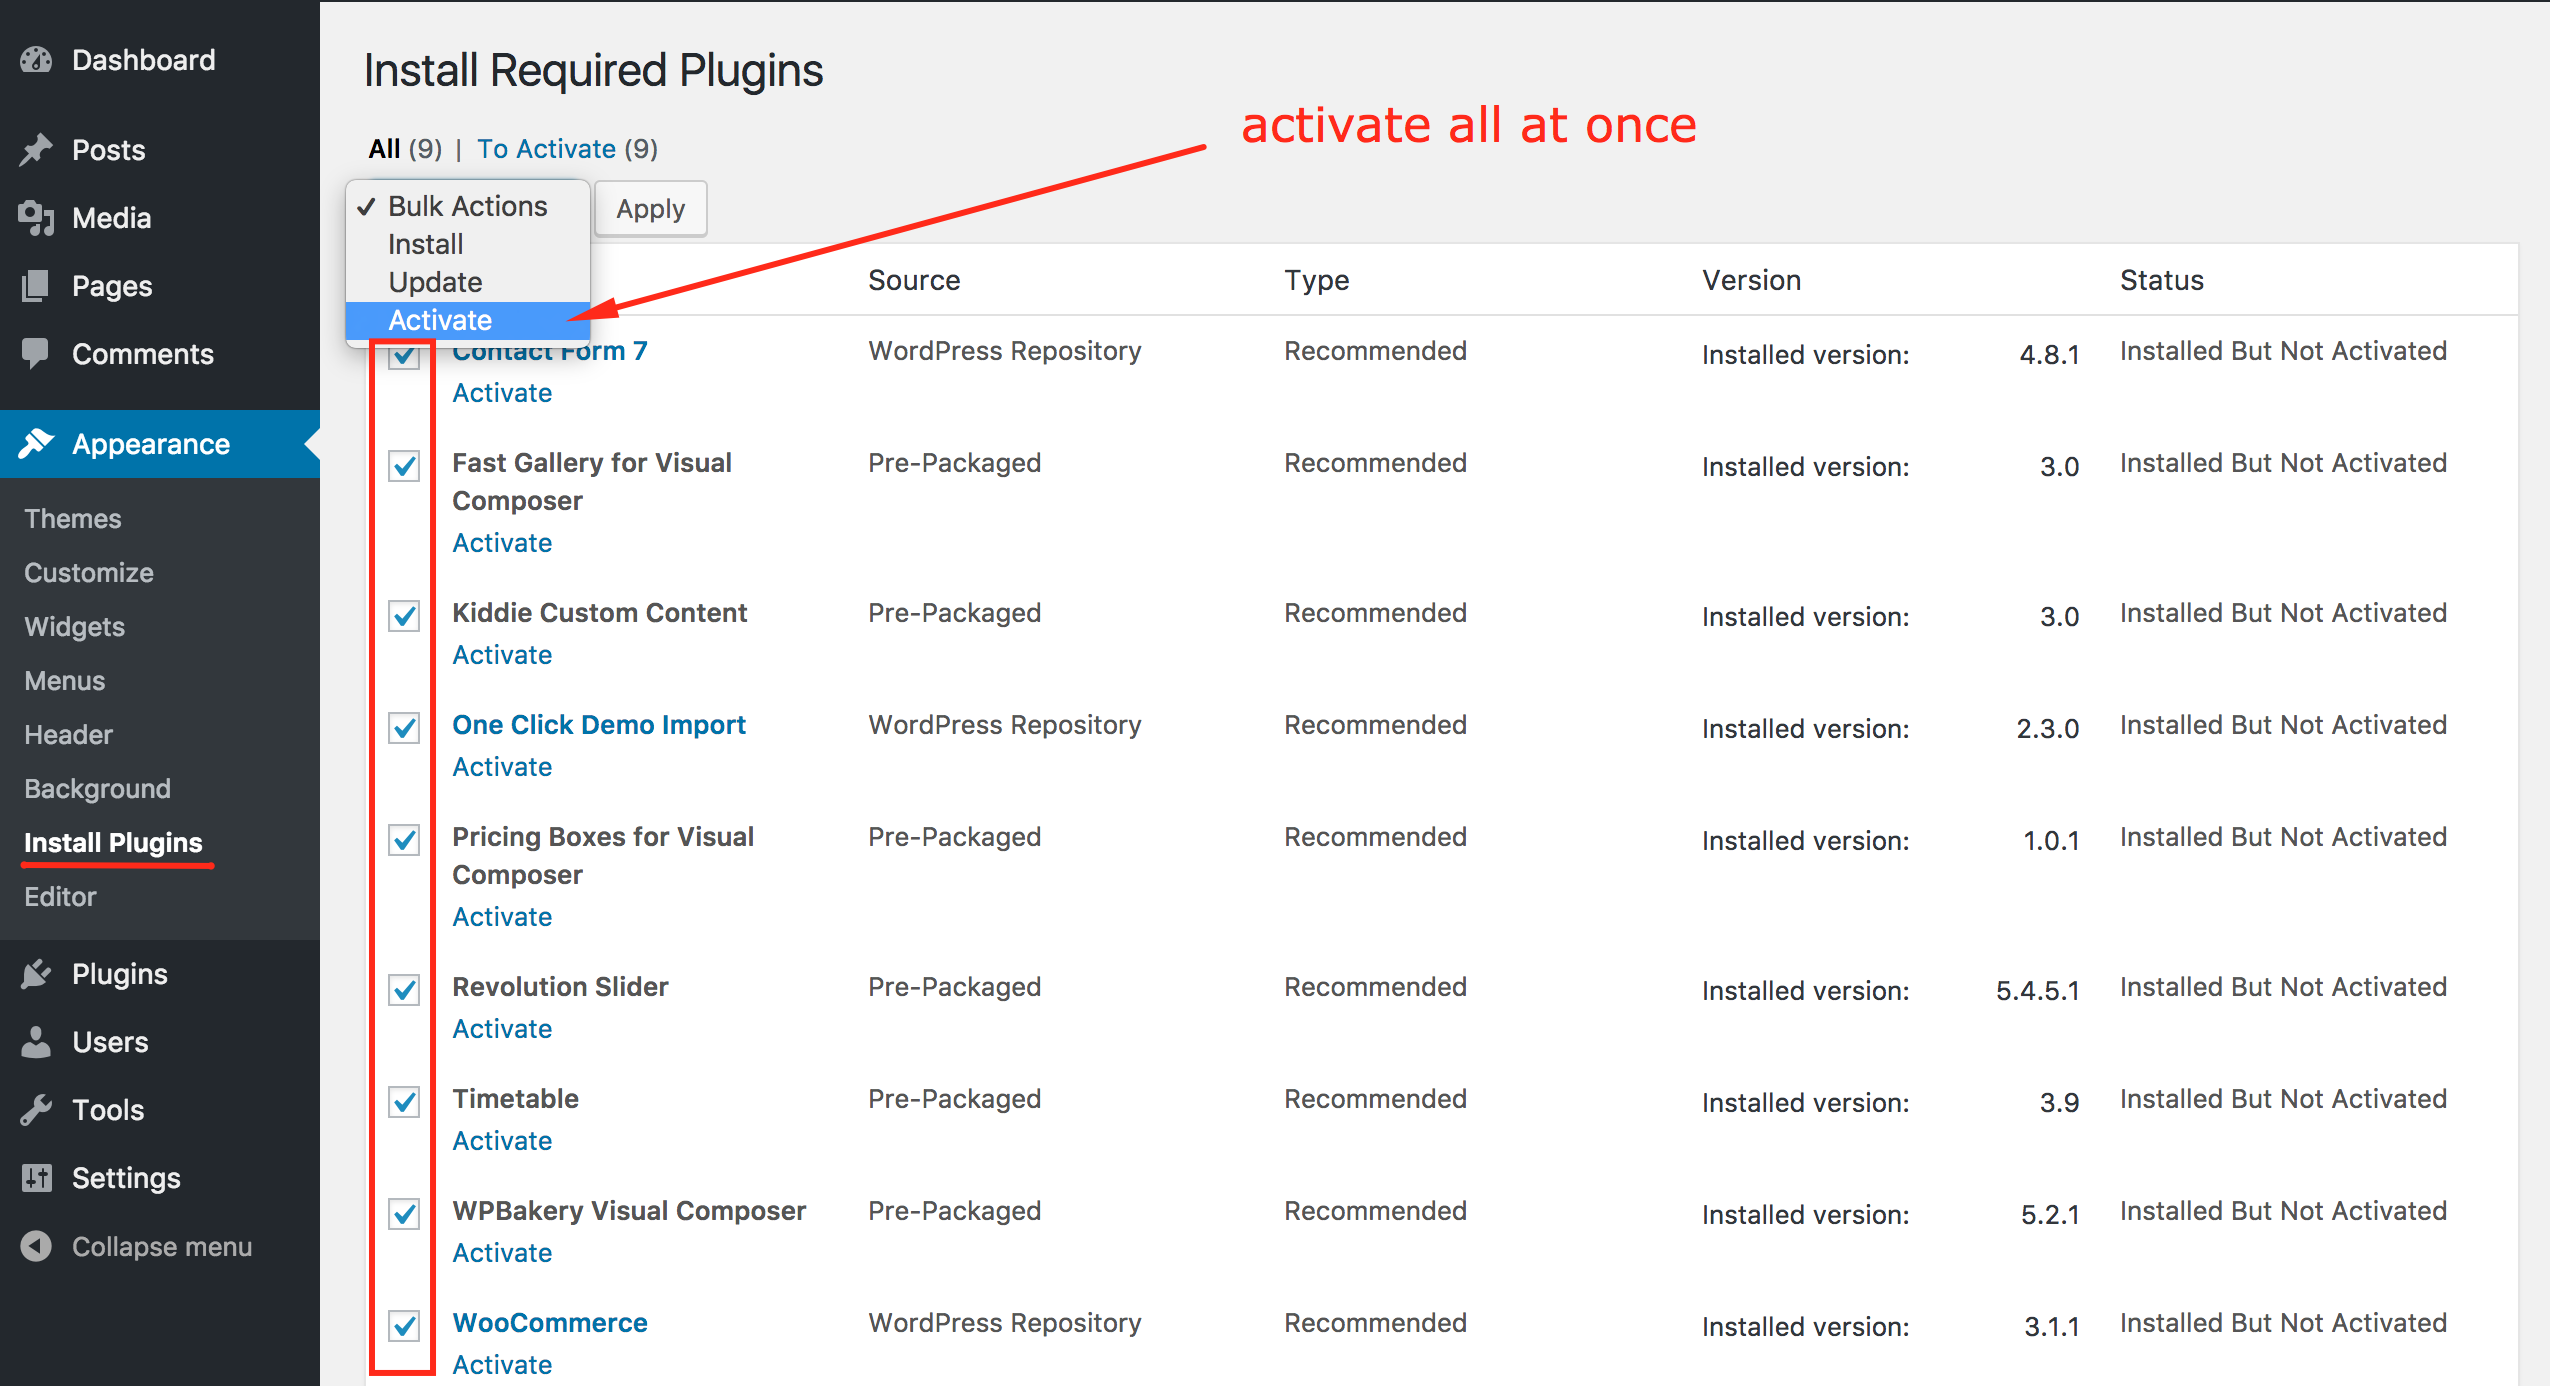
So, you need to install first and then activate these all plugins as demonstrated below.
Install All at Once
Activate All at Once
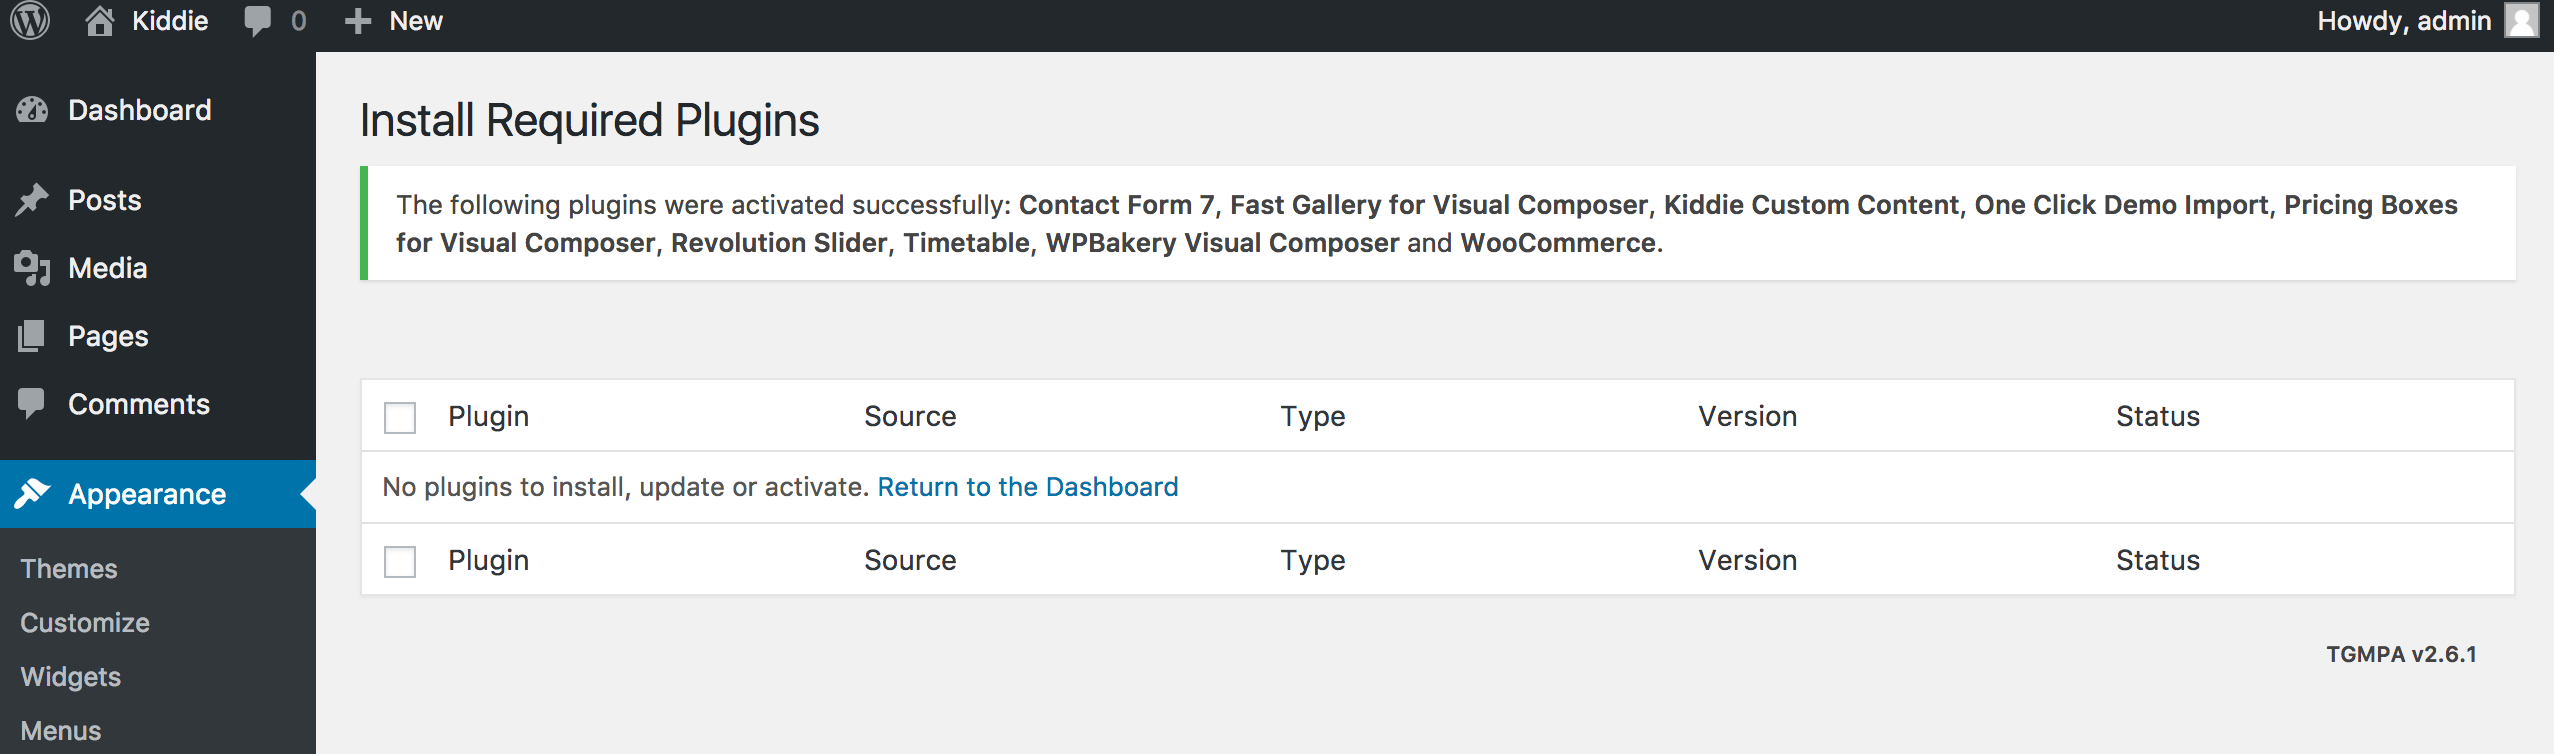
This is what you should see when all done
Install Child Theme
It is better to use child theme as if you need to modify anything you modify in child theme only. This way you can easily update your parent theme whenever new update becomes available on ThemeForest. You can read more about child theme from here.
To install child theme, you need to upload the kiddie-child.zip and activate it in the same way as you uploaded and activated the parent theme's kiddie.zip.
Import Demo Content
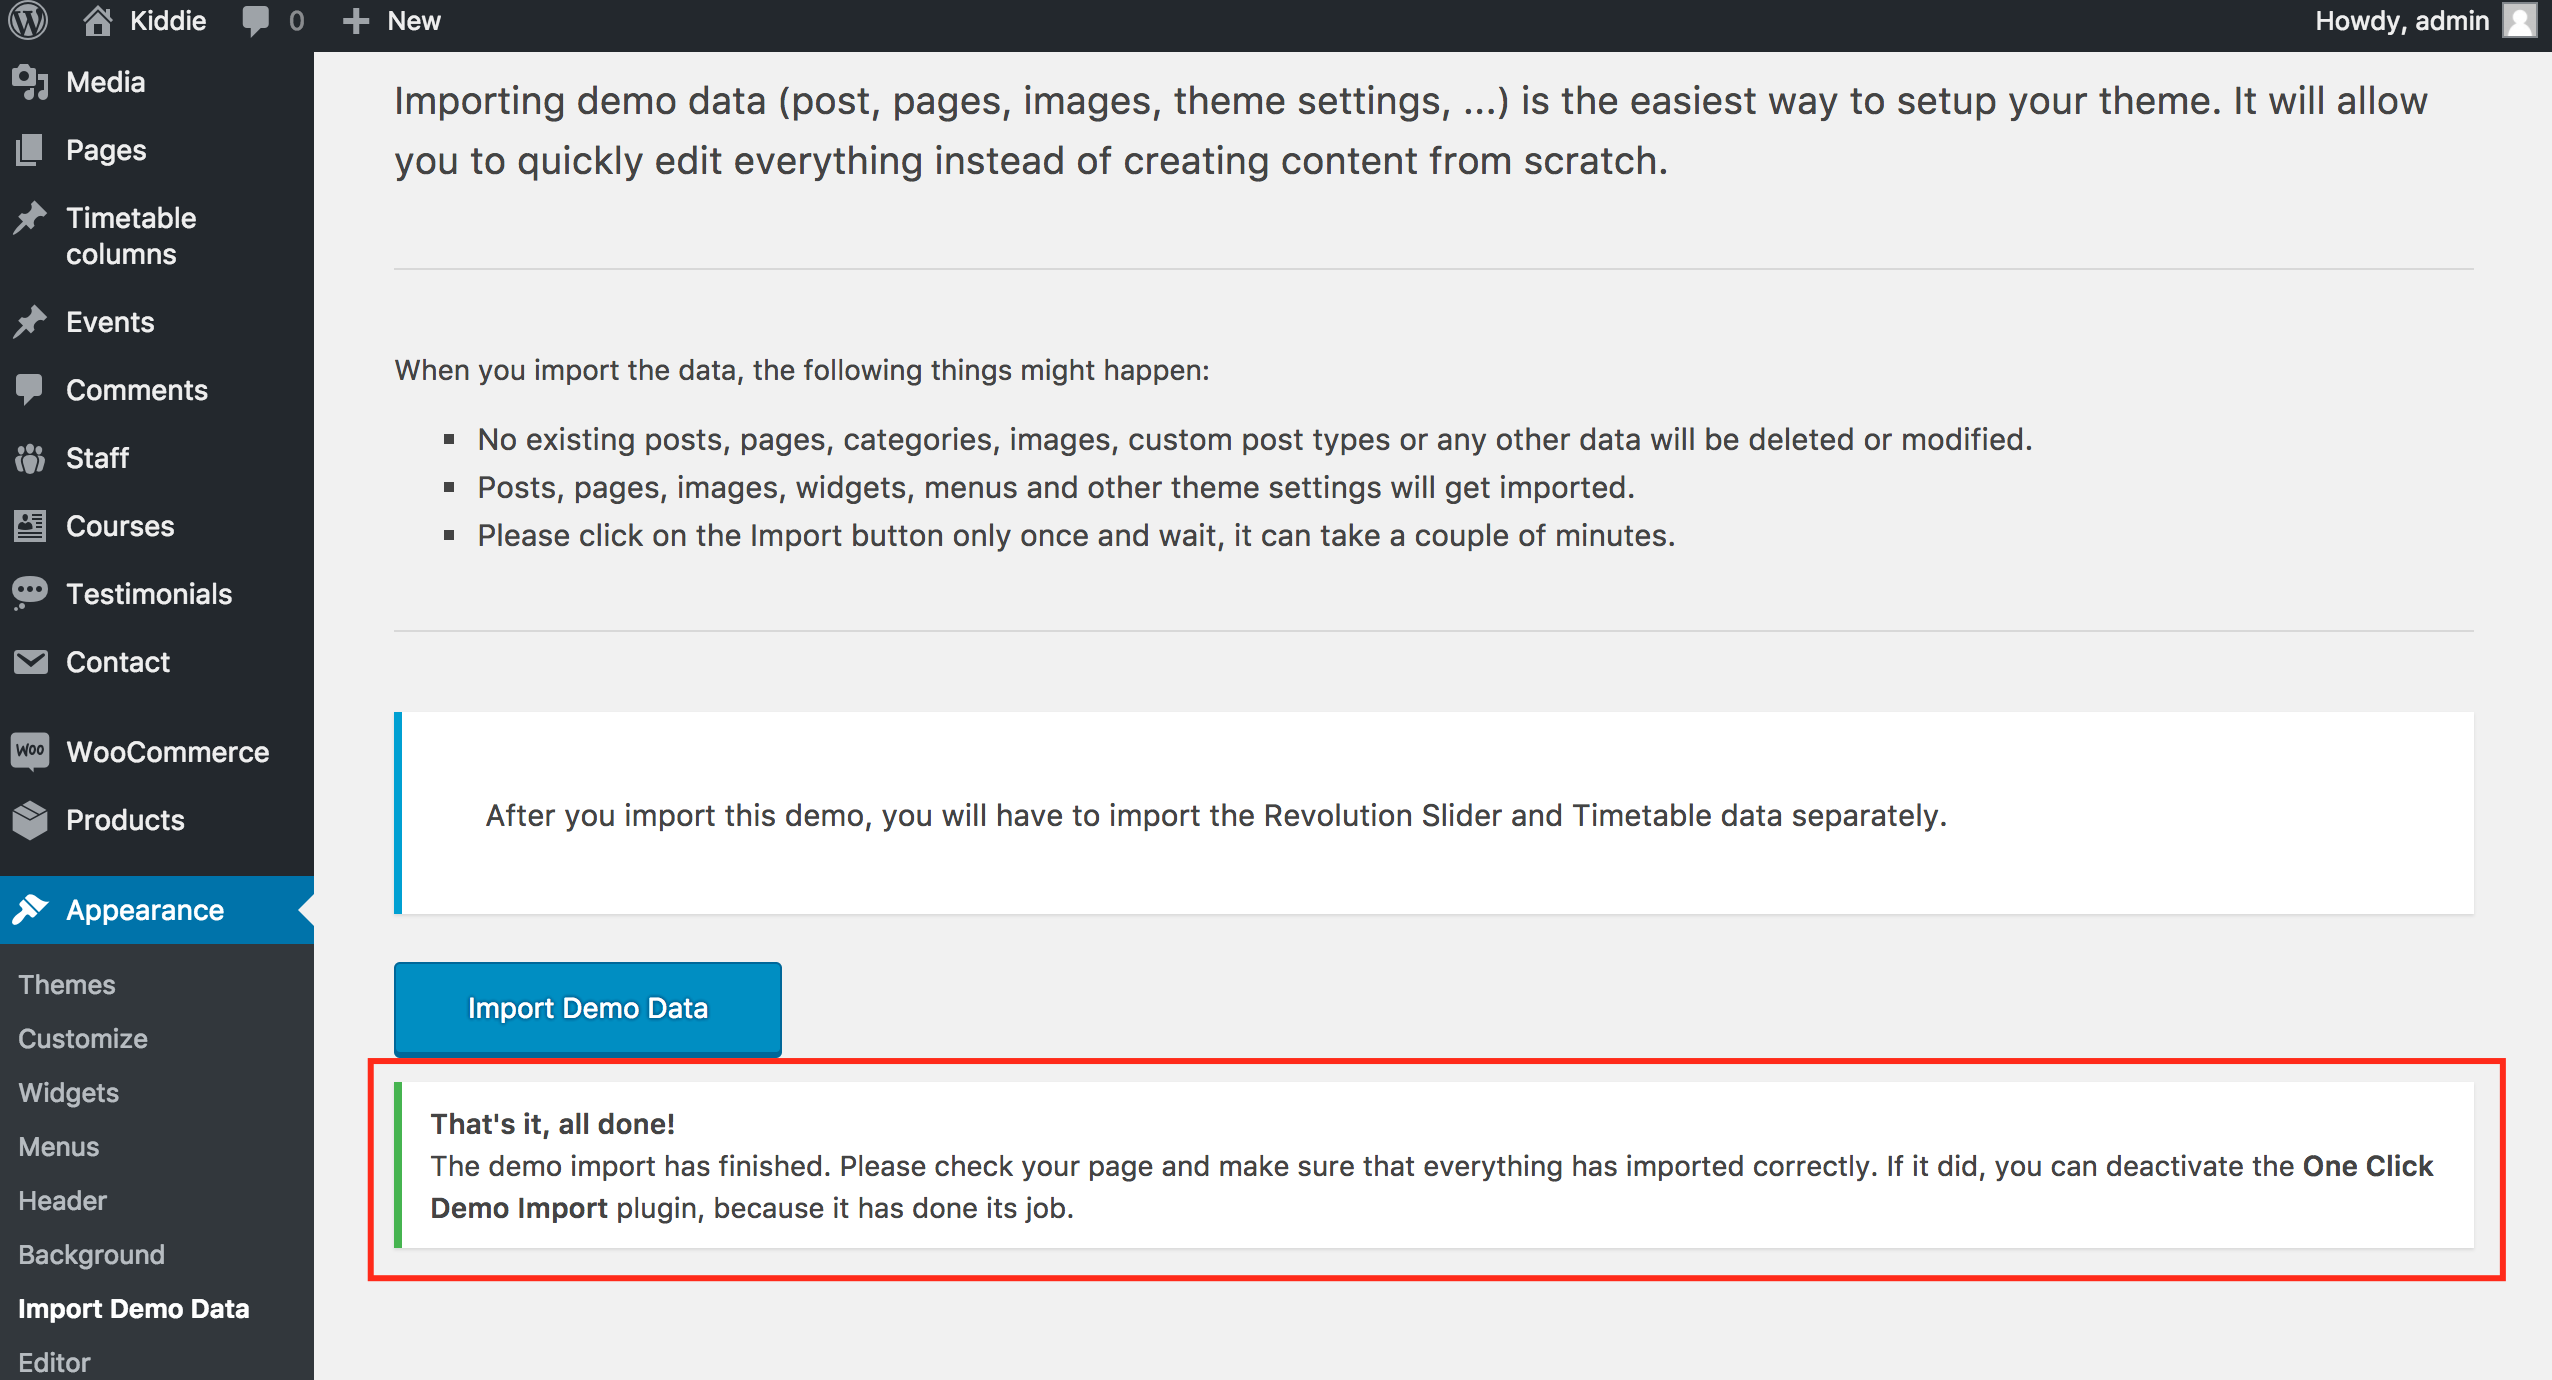
One click demo importer will add all its contents like pages, posts, custom post types, widgets and their contents. It will also set the Primary Menu and Homepage for you. You will still have to do 2 small imports to make your website complete (Revolution Slider and Timetable data ... we provide their data too) but let's take things step by step.
Go to the WordPress Admin > Appearance > Import Demo Data and start importing data

Once the demo data has been imported you can deactivate this plugin as recommened in the picture too
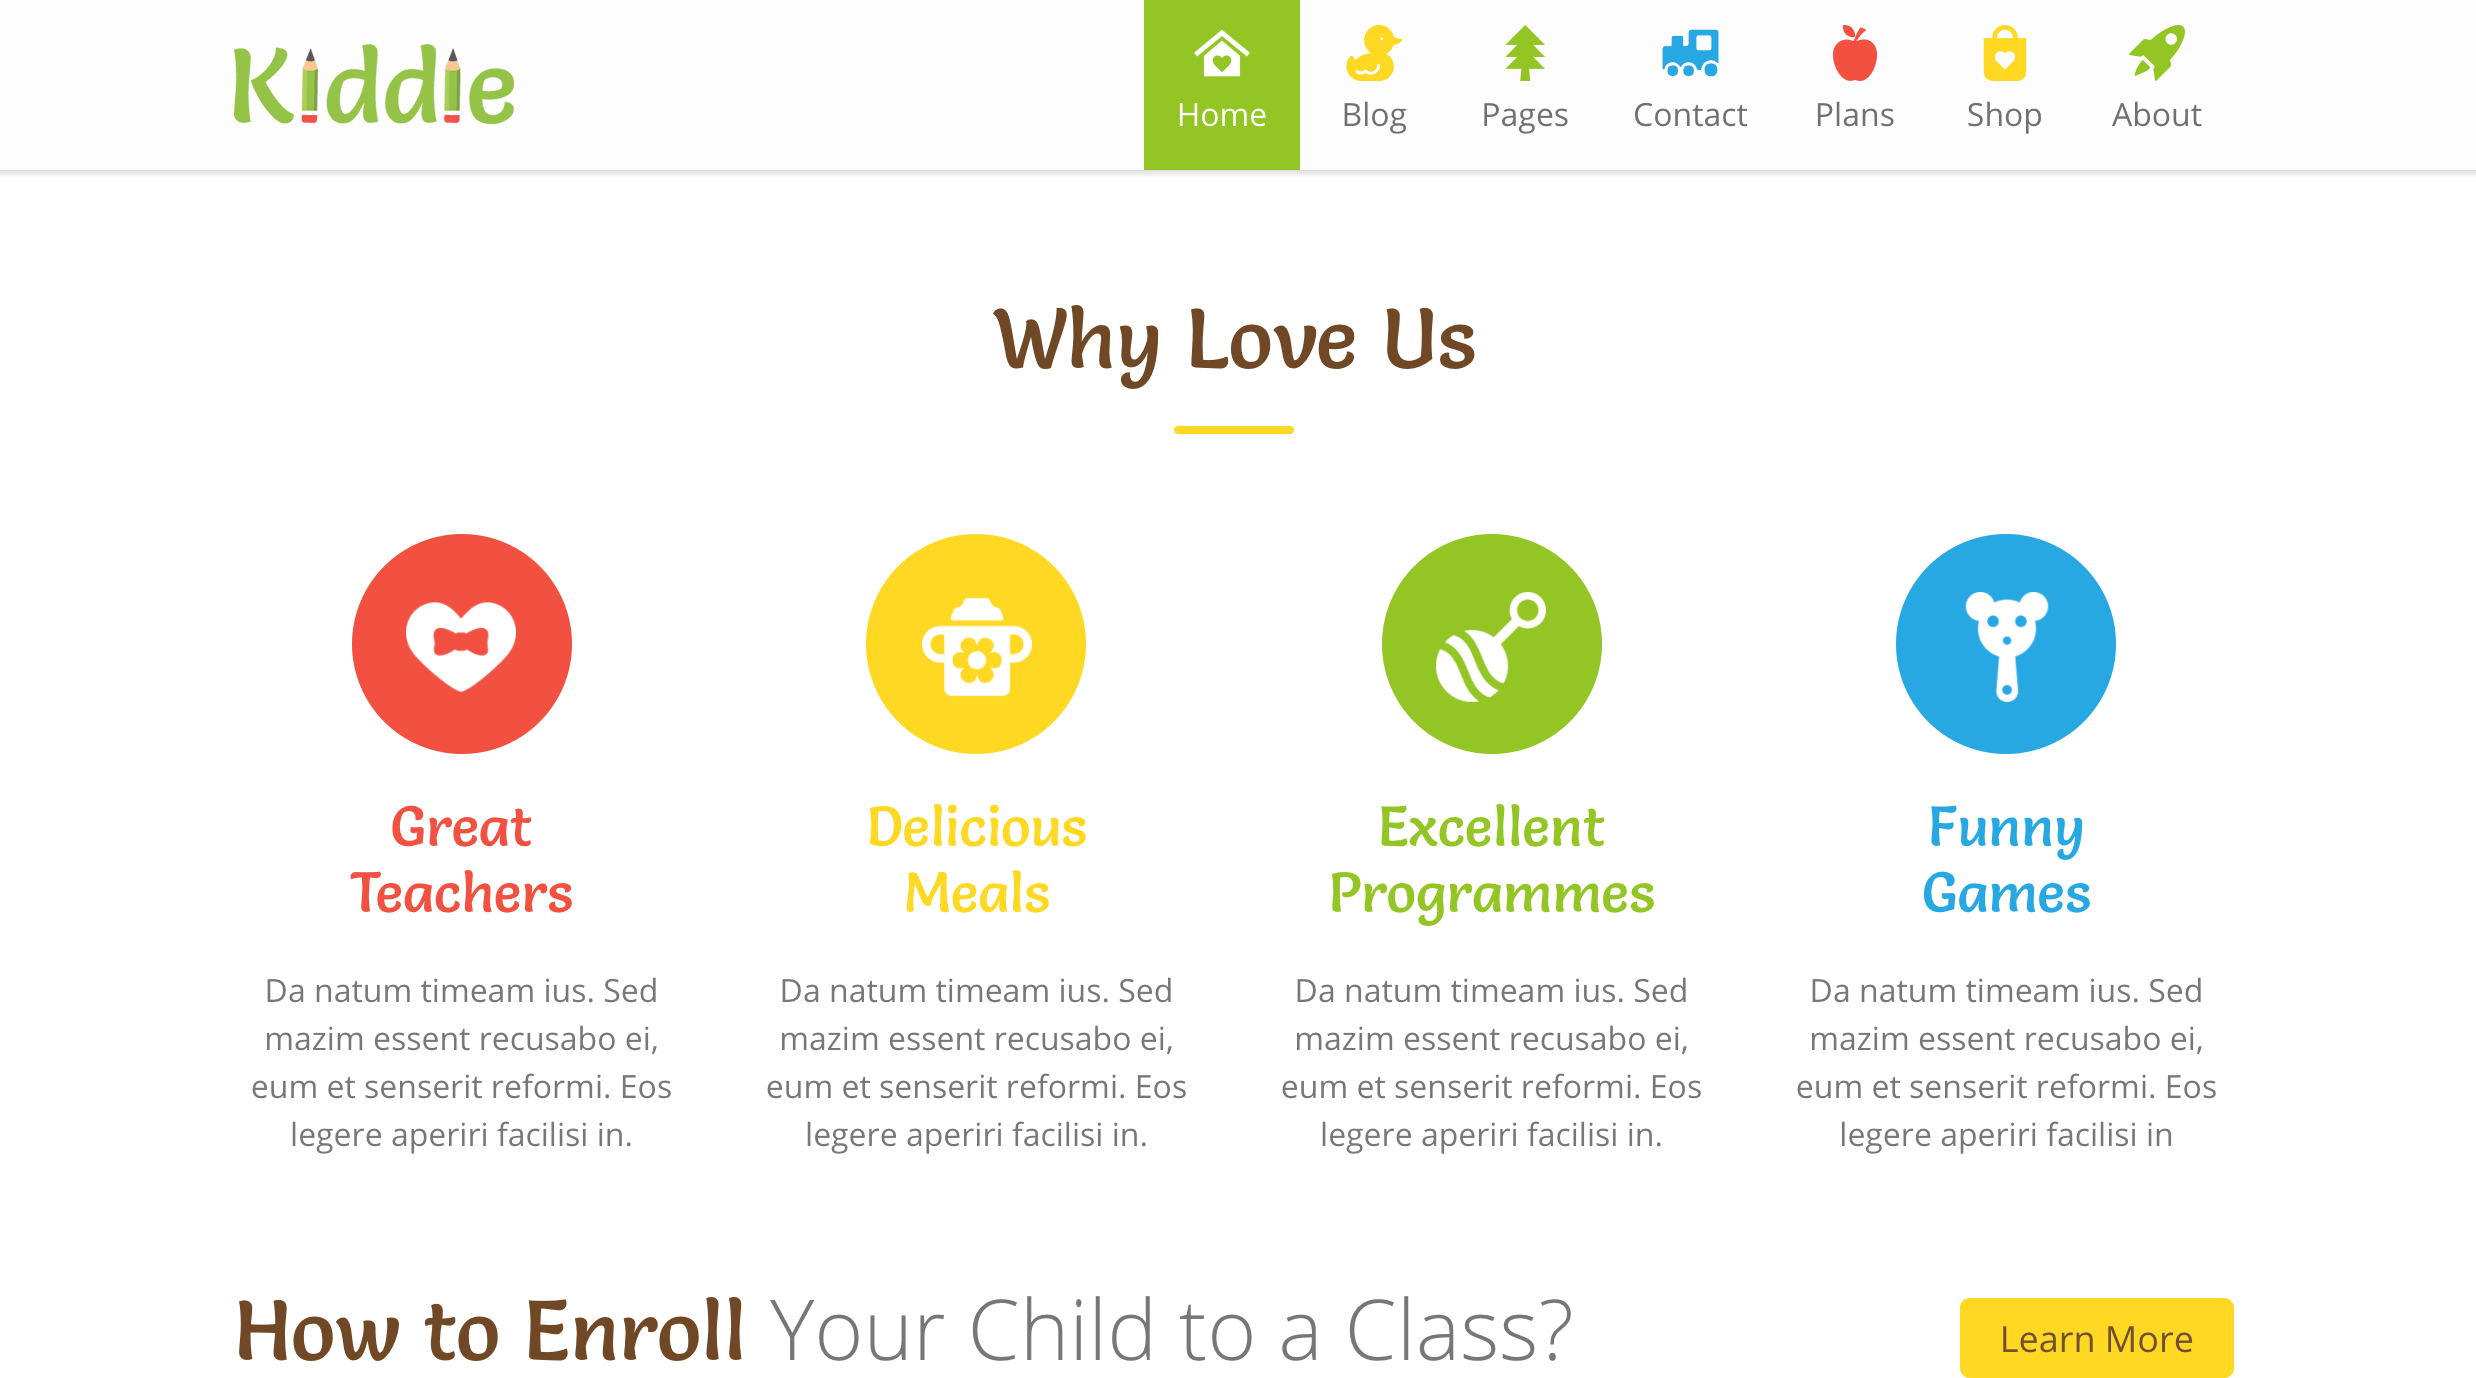
Your website homepage should look now like this
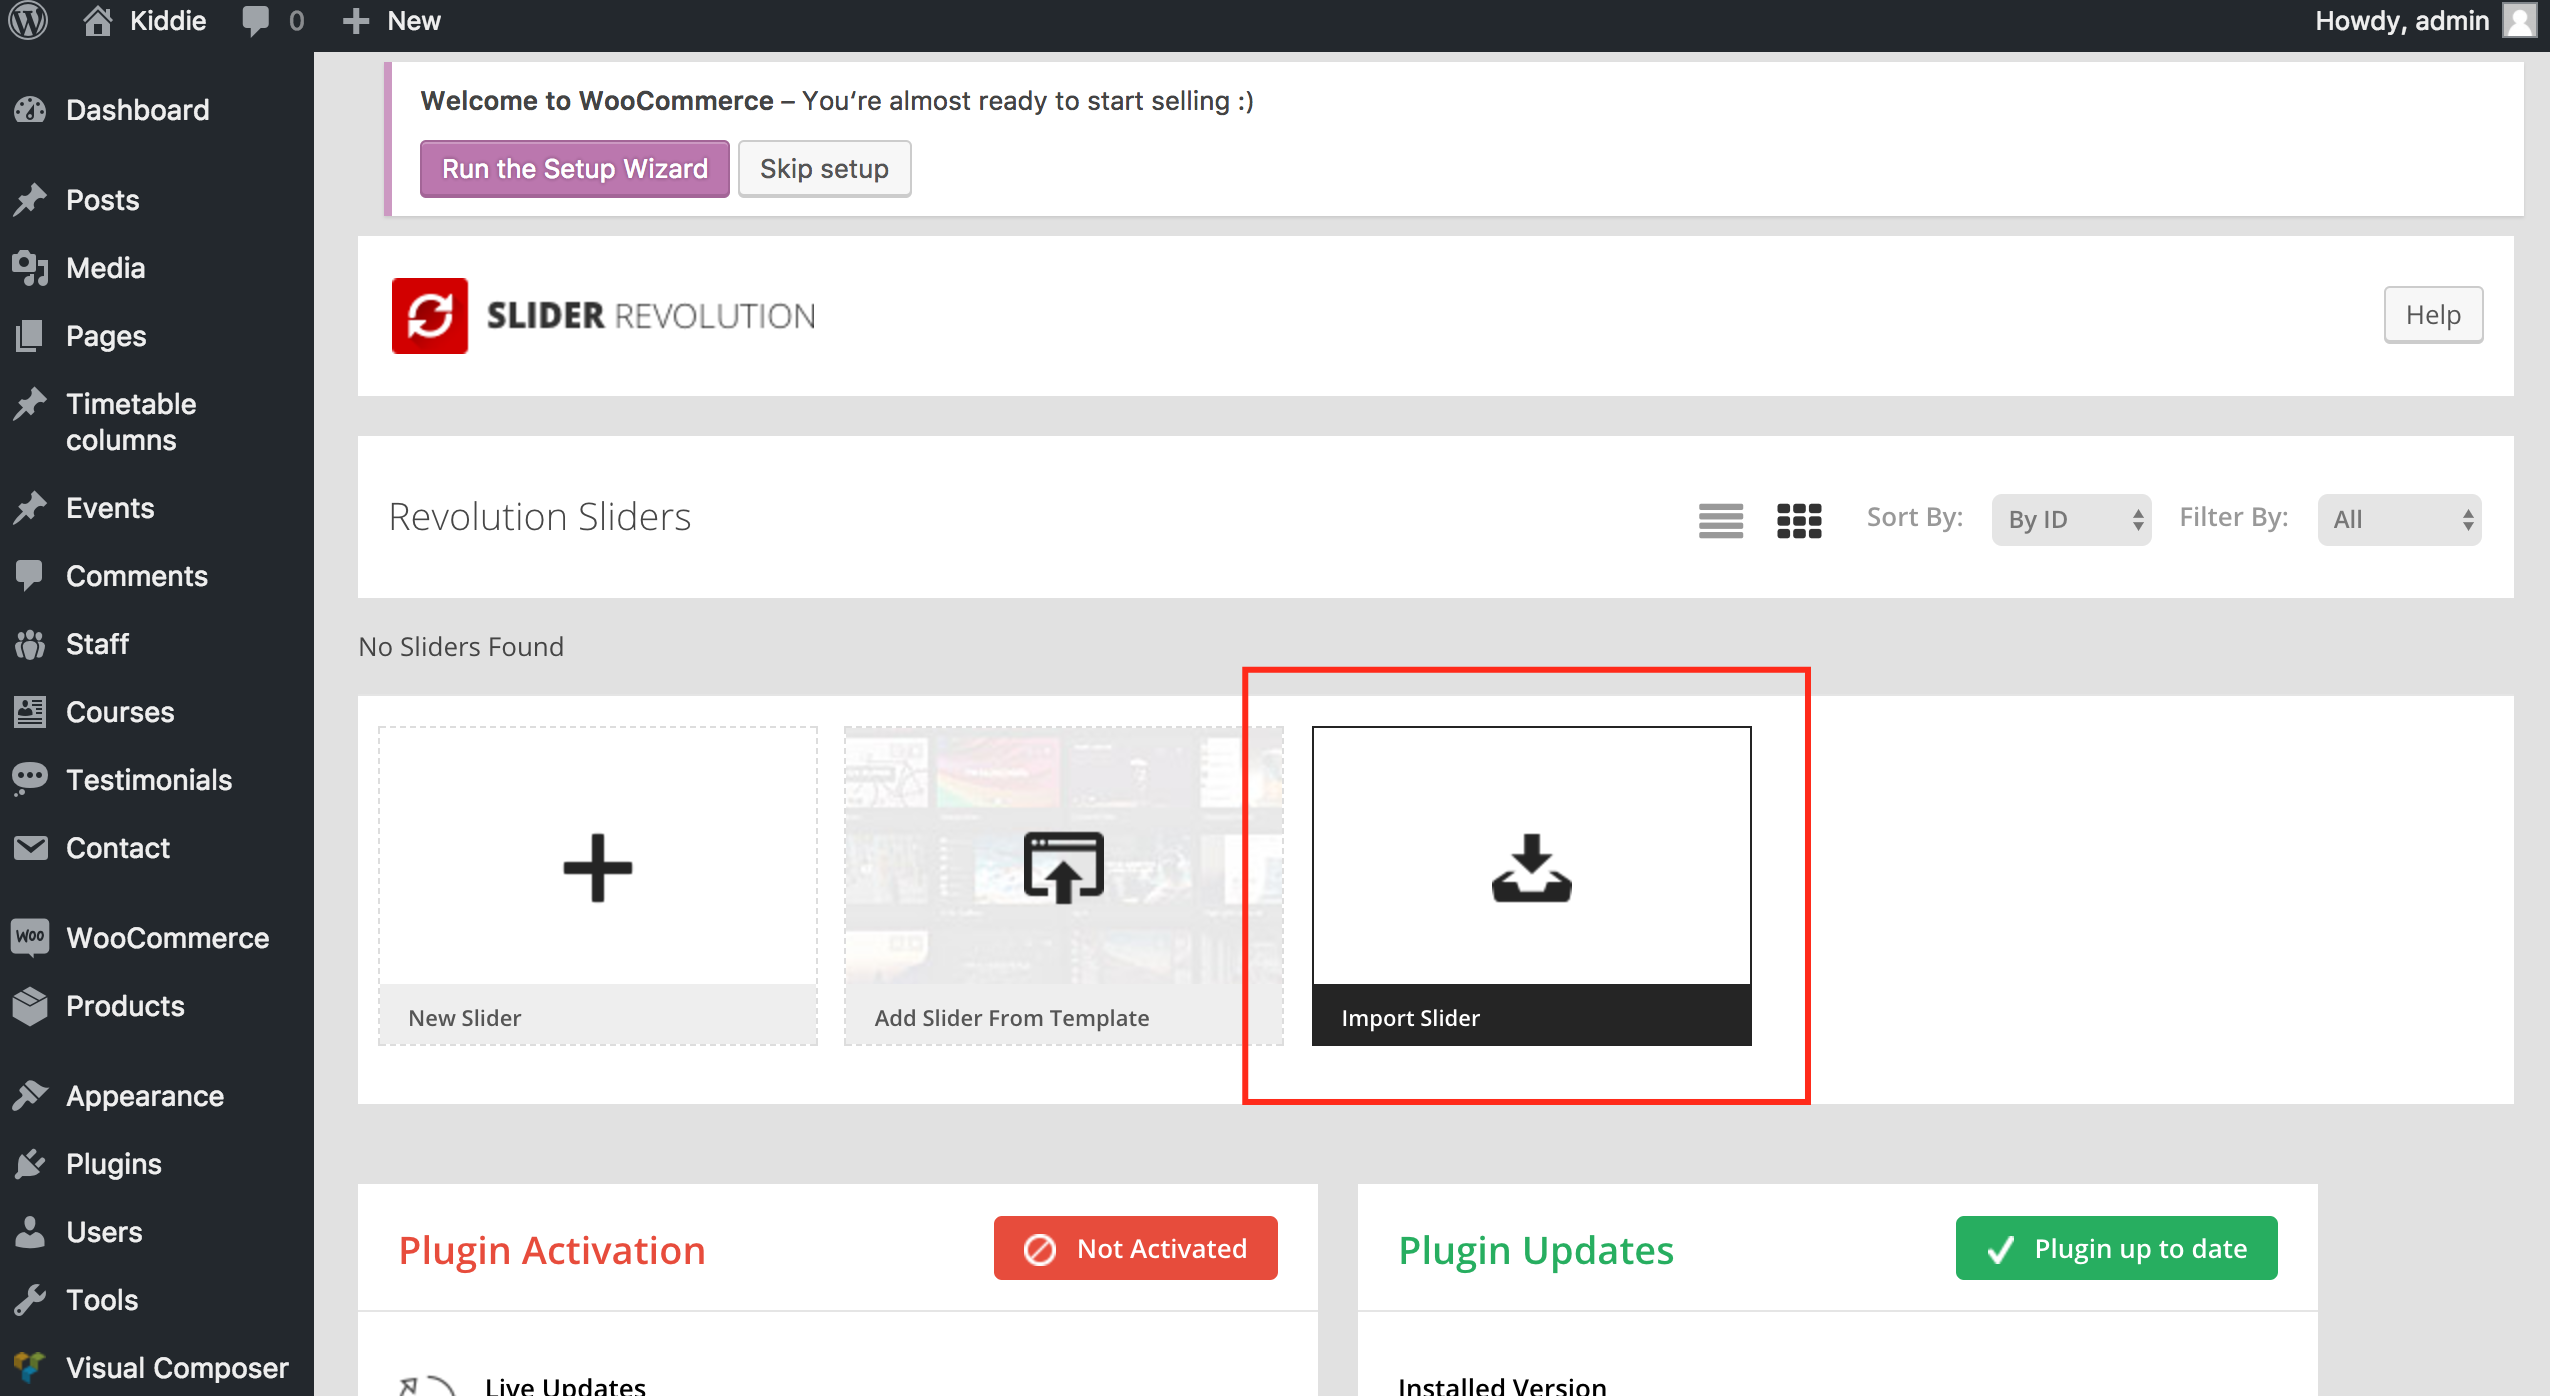
Next we'll import Revolution Slider. Slider files can be found in ThemeForest package under the Import-Data folder. Choose your slider and import it as below. (E.g: We'll import kiddie_slider.zip)
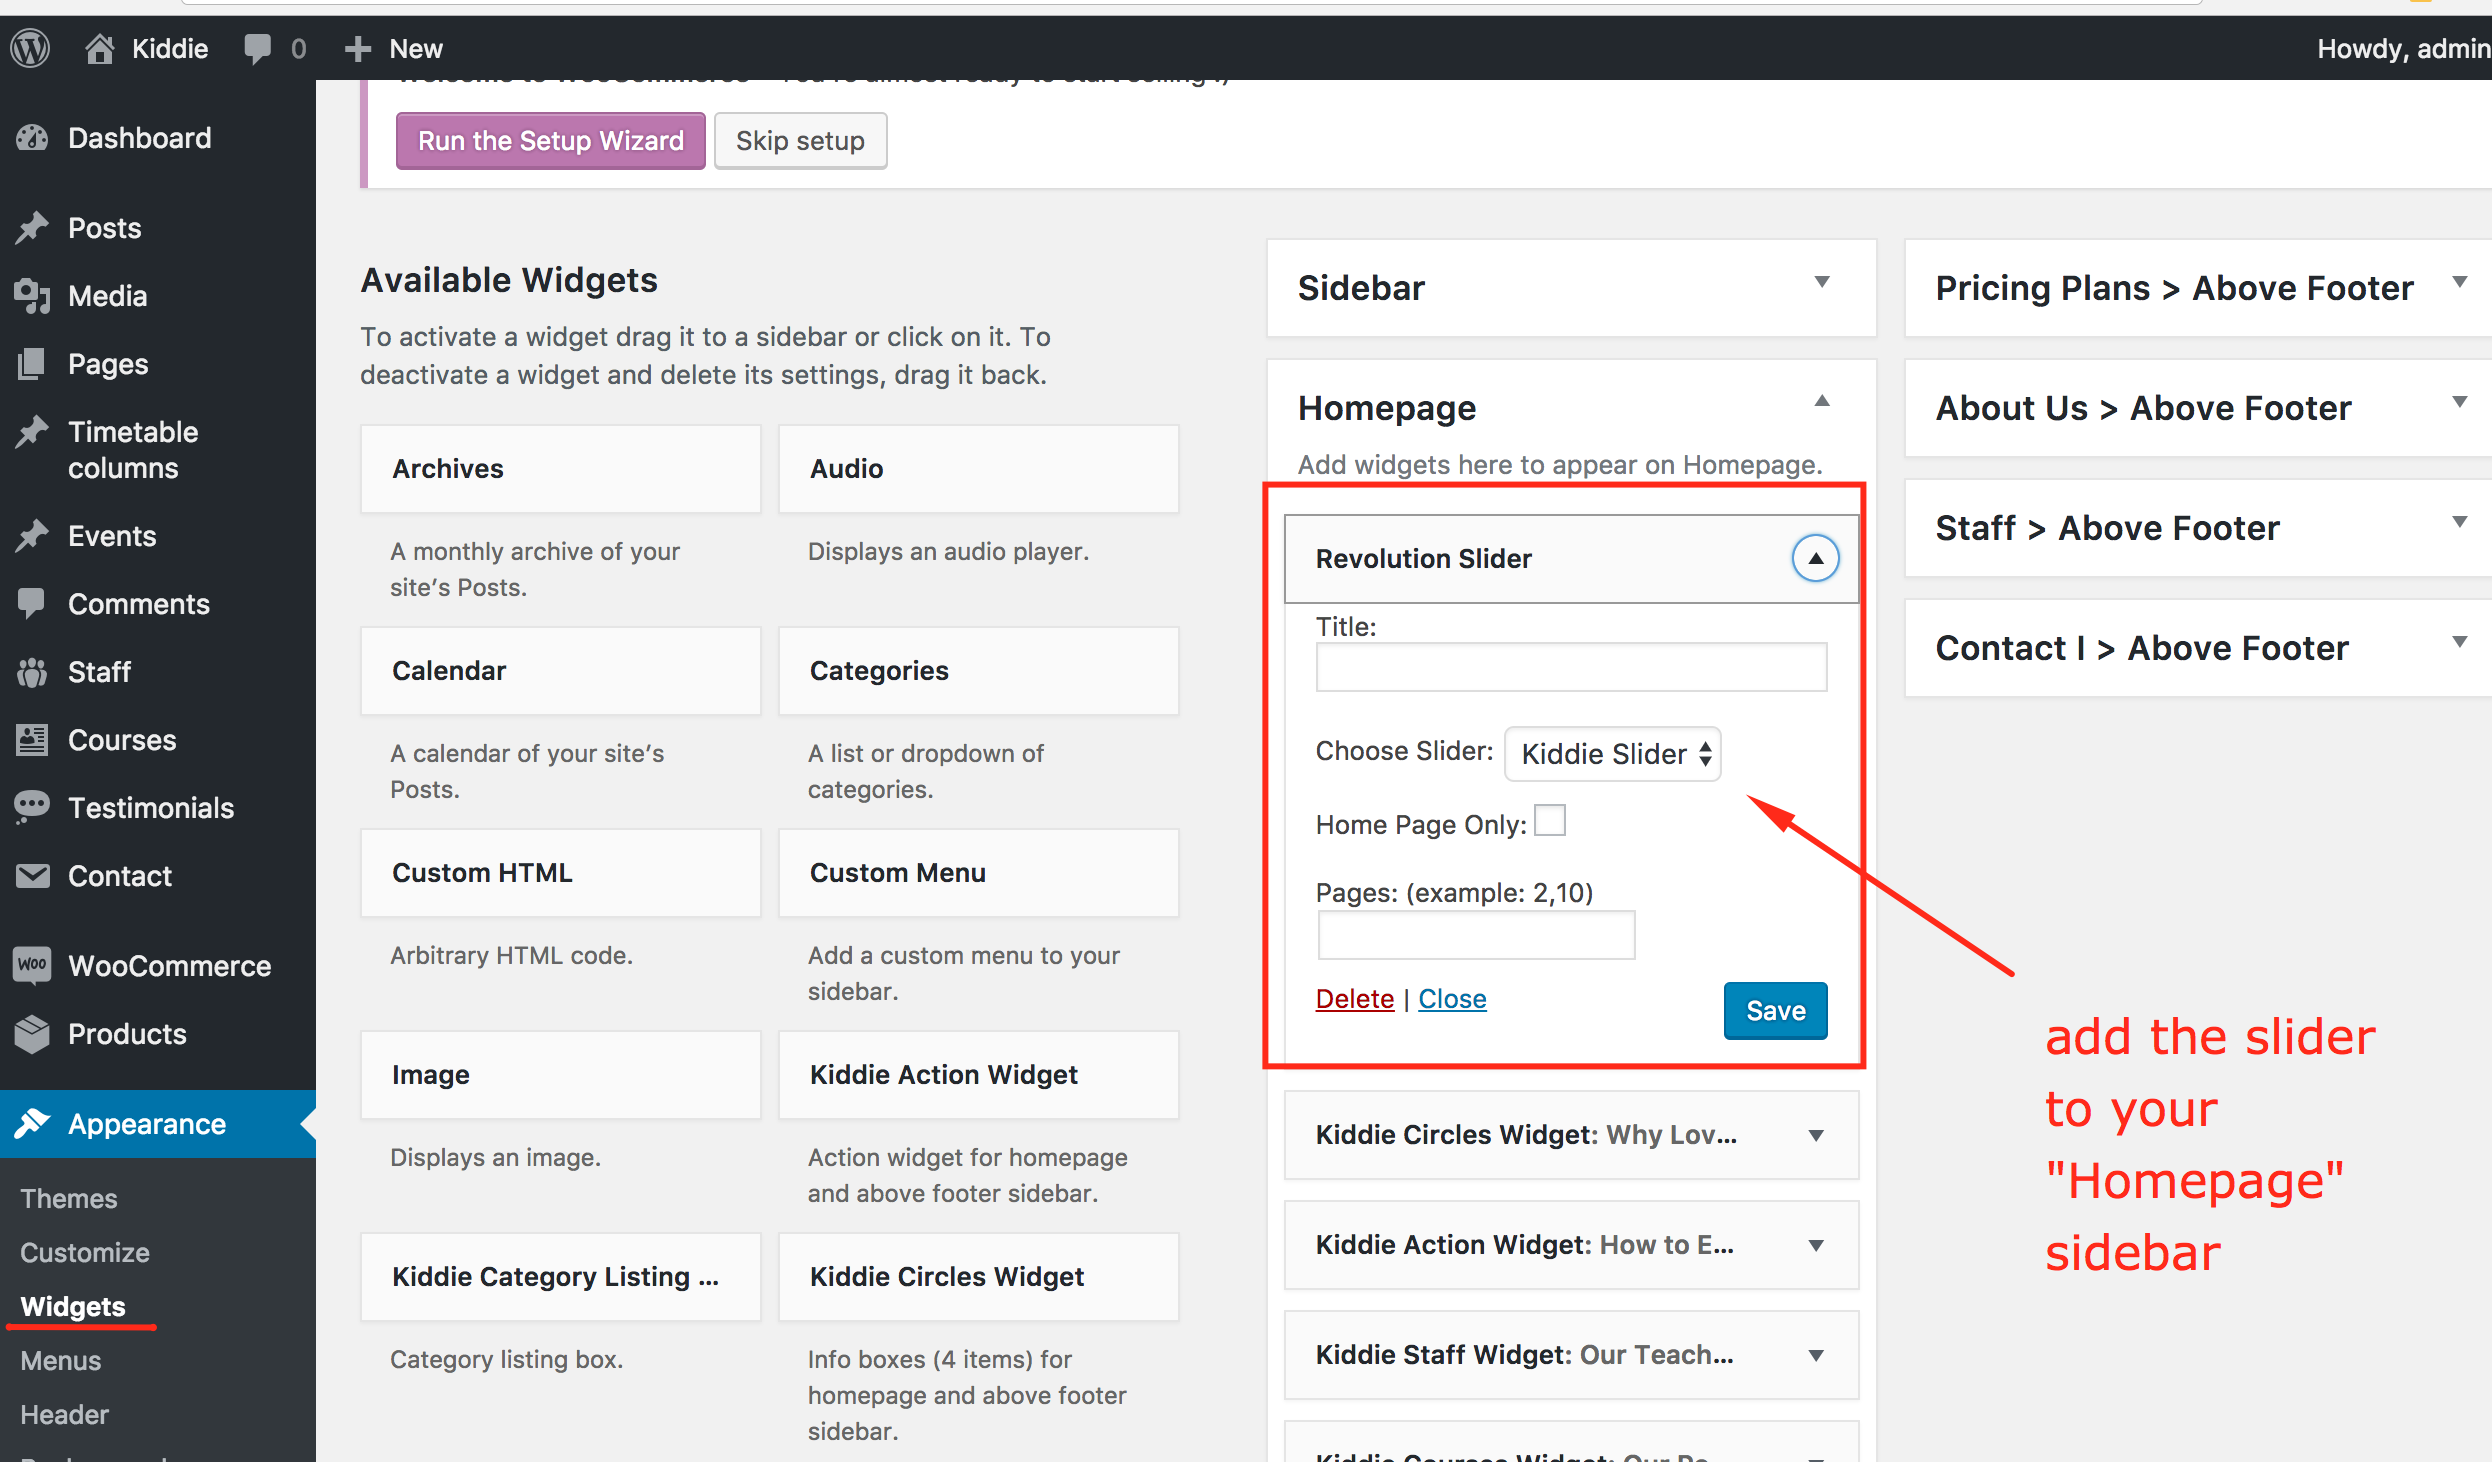
Once you imported the slider you can add it to your Homepage sidebar as a widget. Now your homepage is complete.
Import dummy content for Timetable plugin
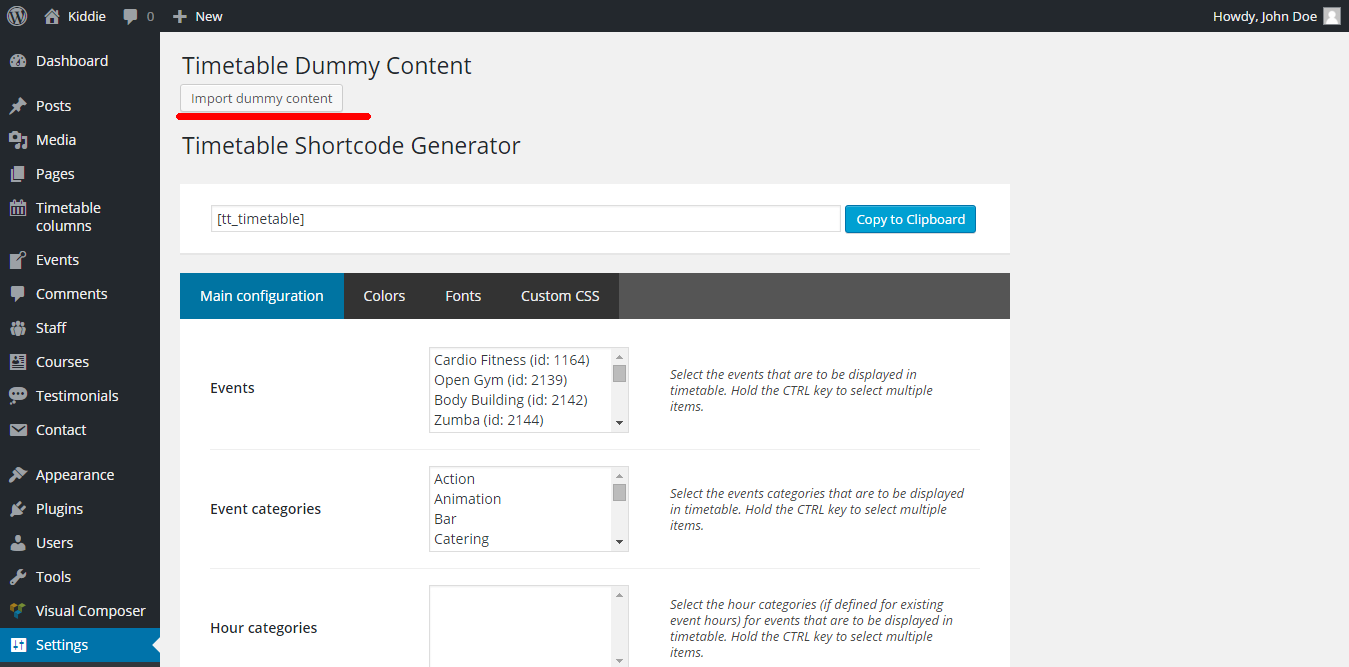
Navigate to Settings > Timetable and use the top button "Import dummy content" as pointed in screenshot below.
At this point if you followed all the steps your site installation is complete and matches our demo site. If any issues please send us a Support Ticket We'll be happy to help!
Create Home Page
In case of imported XML the this page is already created and you do not need to follow this section.
To set up the Home page you need to create a new page,
Go to Pages > Add New. You can give this page a title "Home" yet you do not need to include any contents for now.
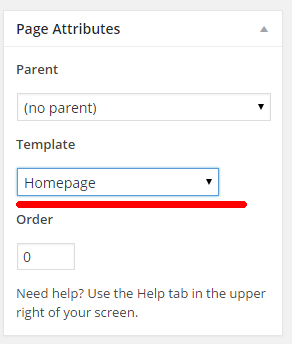
Select the “Home Template” template from the Page Attributes section, as displayed in screen shot below and click “Publish”.
Credits / Demo Content
A few words about resources included with this theme
Icons
Icons you can find in Font Icons section (Flaticon) are an integral part of the Theme, please do not use it separately for other purposes.
Images
- Premium images you can use along with this Theme without asking permission (included in downloadable package):
-
Premium images only for live preview purposes. You have to buy a license to use along with this Theme:
- Cute Girl Writing On Board In Kindergarten
- Cute Children Study at Daycare
- Kindergarten Teacher Helping Student with Reading Skills
- Children Resting
- Little Girl and Mom Playing in a Children Puzzle
- Cute Little Children Lying on Floor
- Group of Cute Little Preschool Kids Drawing
- Concentrated Child Playing Logical Education Toys
- Smiles
- Lunch in Kindergarten
- All other images comes with this Theme are licensed under Creative Commons Zero CC0 1.0 Universal (CC0 1.0). You can use it along with this Theme without asking permission.
Configure Reading Settings
We are assuming that you have done the Import Data succesfully and you have your home page available for use. If this is not the case then simply create a new page using Home Template and name it as Home
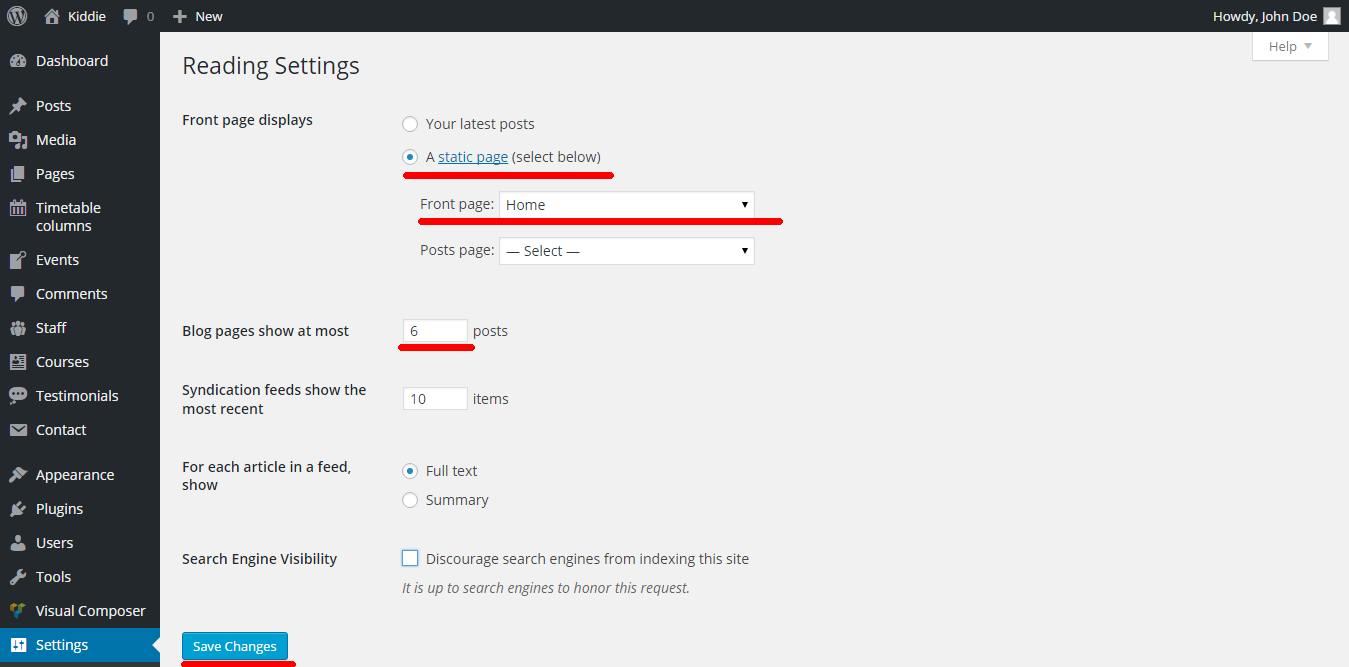
To configure reading settings you need to visit WordPress Admin > Settings > Reading and choose that front page displays as static page. Then select Home as Front Page. As, displayed in screen shot below.
Configure Home Page
In case of imported XML the home page is already created but not populated with widgets. Kiddie homepage it is an area built by widgets. To configure this page simply populate the Homepage sidebar with widgets designed for this area.
To set up the Home page you need to drag and drop the wanted widgets in Homepage sidebar.
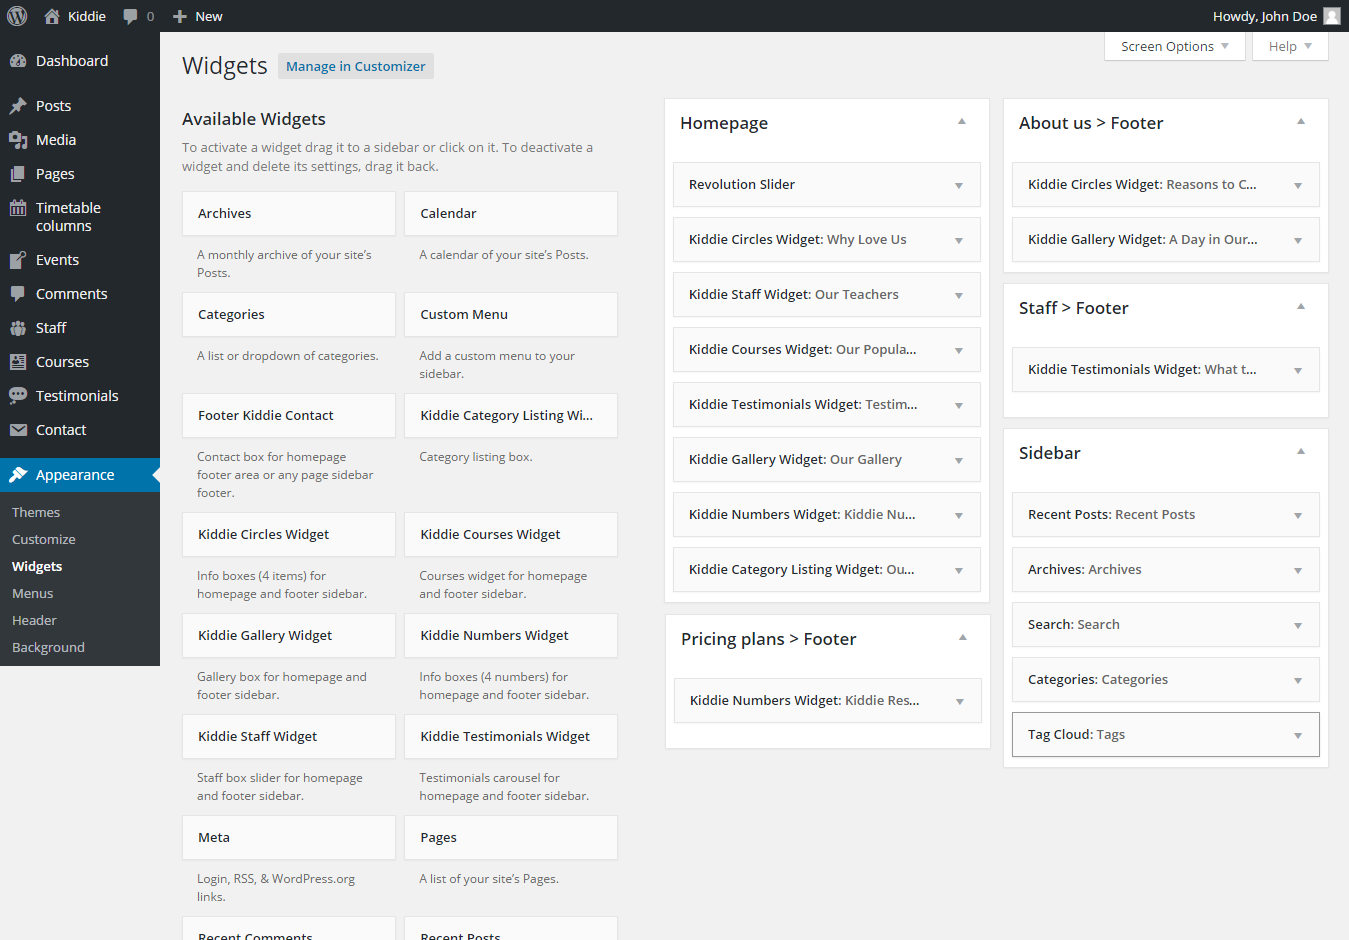
Go to Appearance > Widgets and just drag and drop the widgets you want in the sidebar mentioned above. Your widgets area should look like the image below. Widgets have predefined content so just saved them in the position you want.

Configure Other Sidebars
To set up the sidebars you have to drag and drop the wanted widgets in corresponding sidebar predefined areas.
Go to Appearance > Widgets and just drag and drop the widgets you want in the sidebars you want. Set the widget title and you have your sidebars ready in minutes. Please note that some widgets are meant to be placed in corresponding sidebar areas. If you would like to follow our demo design please check the image below and see how we've placed the widgets.
Configure Permalink Settings
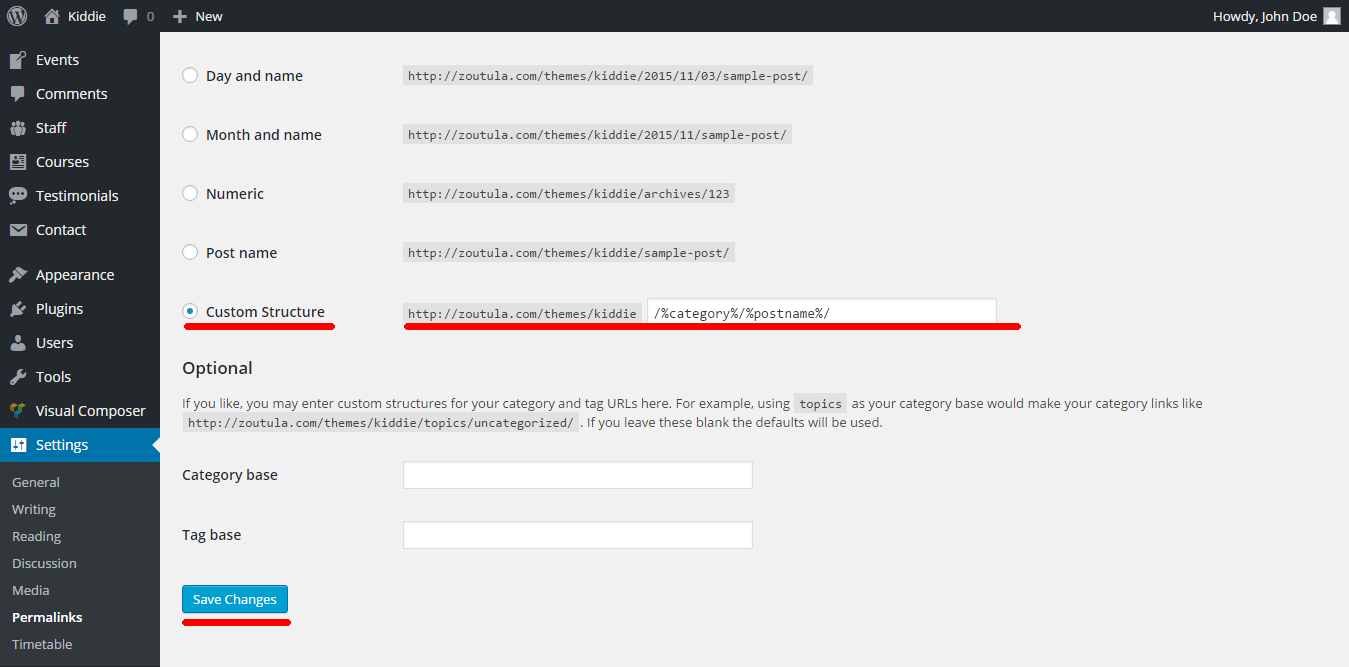
To configure permalink settings visit WordPress Admin > Settings > Permalinks and configure it as displayed in image below. For copy/paste reason we add here the structure too: /%category%/%postname%/ Do not forget to save the changes.
Set Up Revolution Slider
To set up revolution slider you need to install revolution slider plugin that comes as part of the theme package. We are assuming that you already installed the plugin with all the other required plugins at a previous step.
-
Now, Go to Revolution Slider and press import slider.
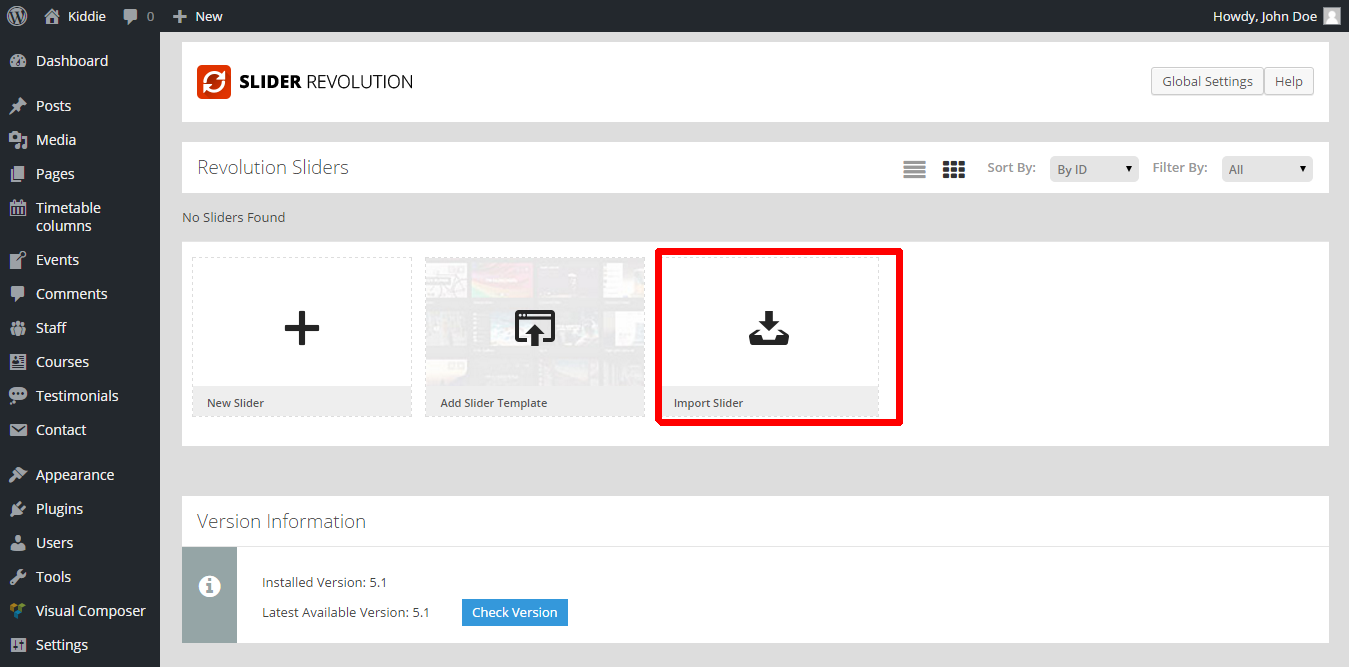
-
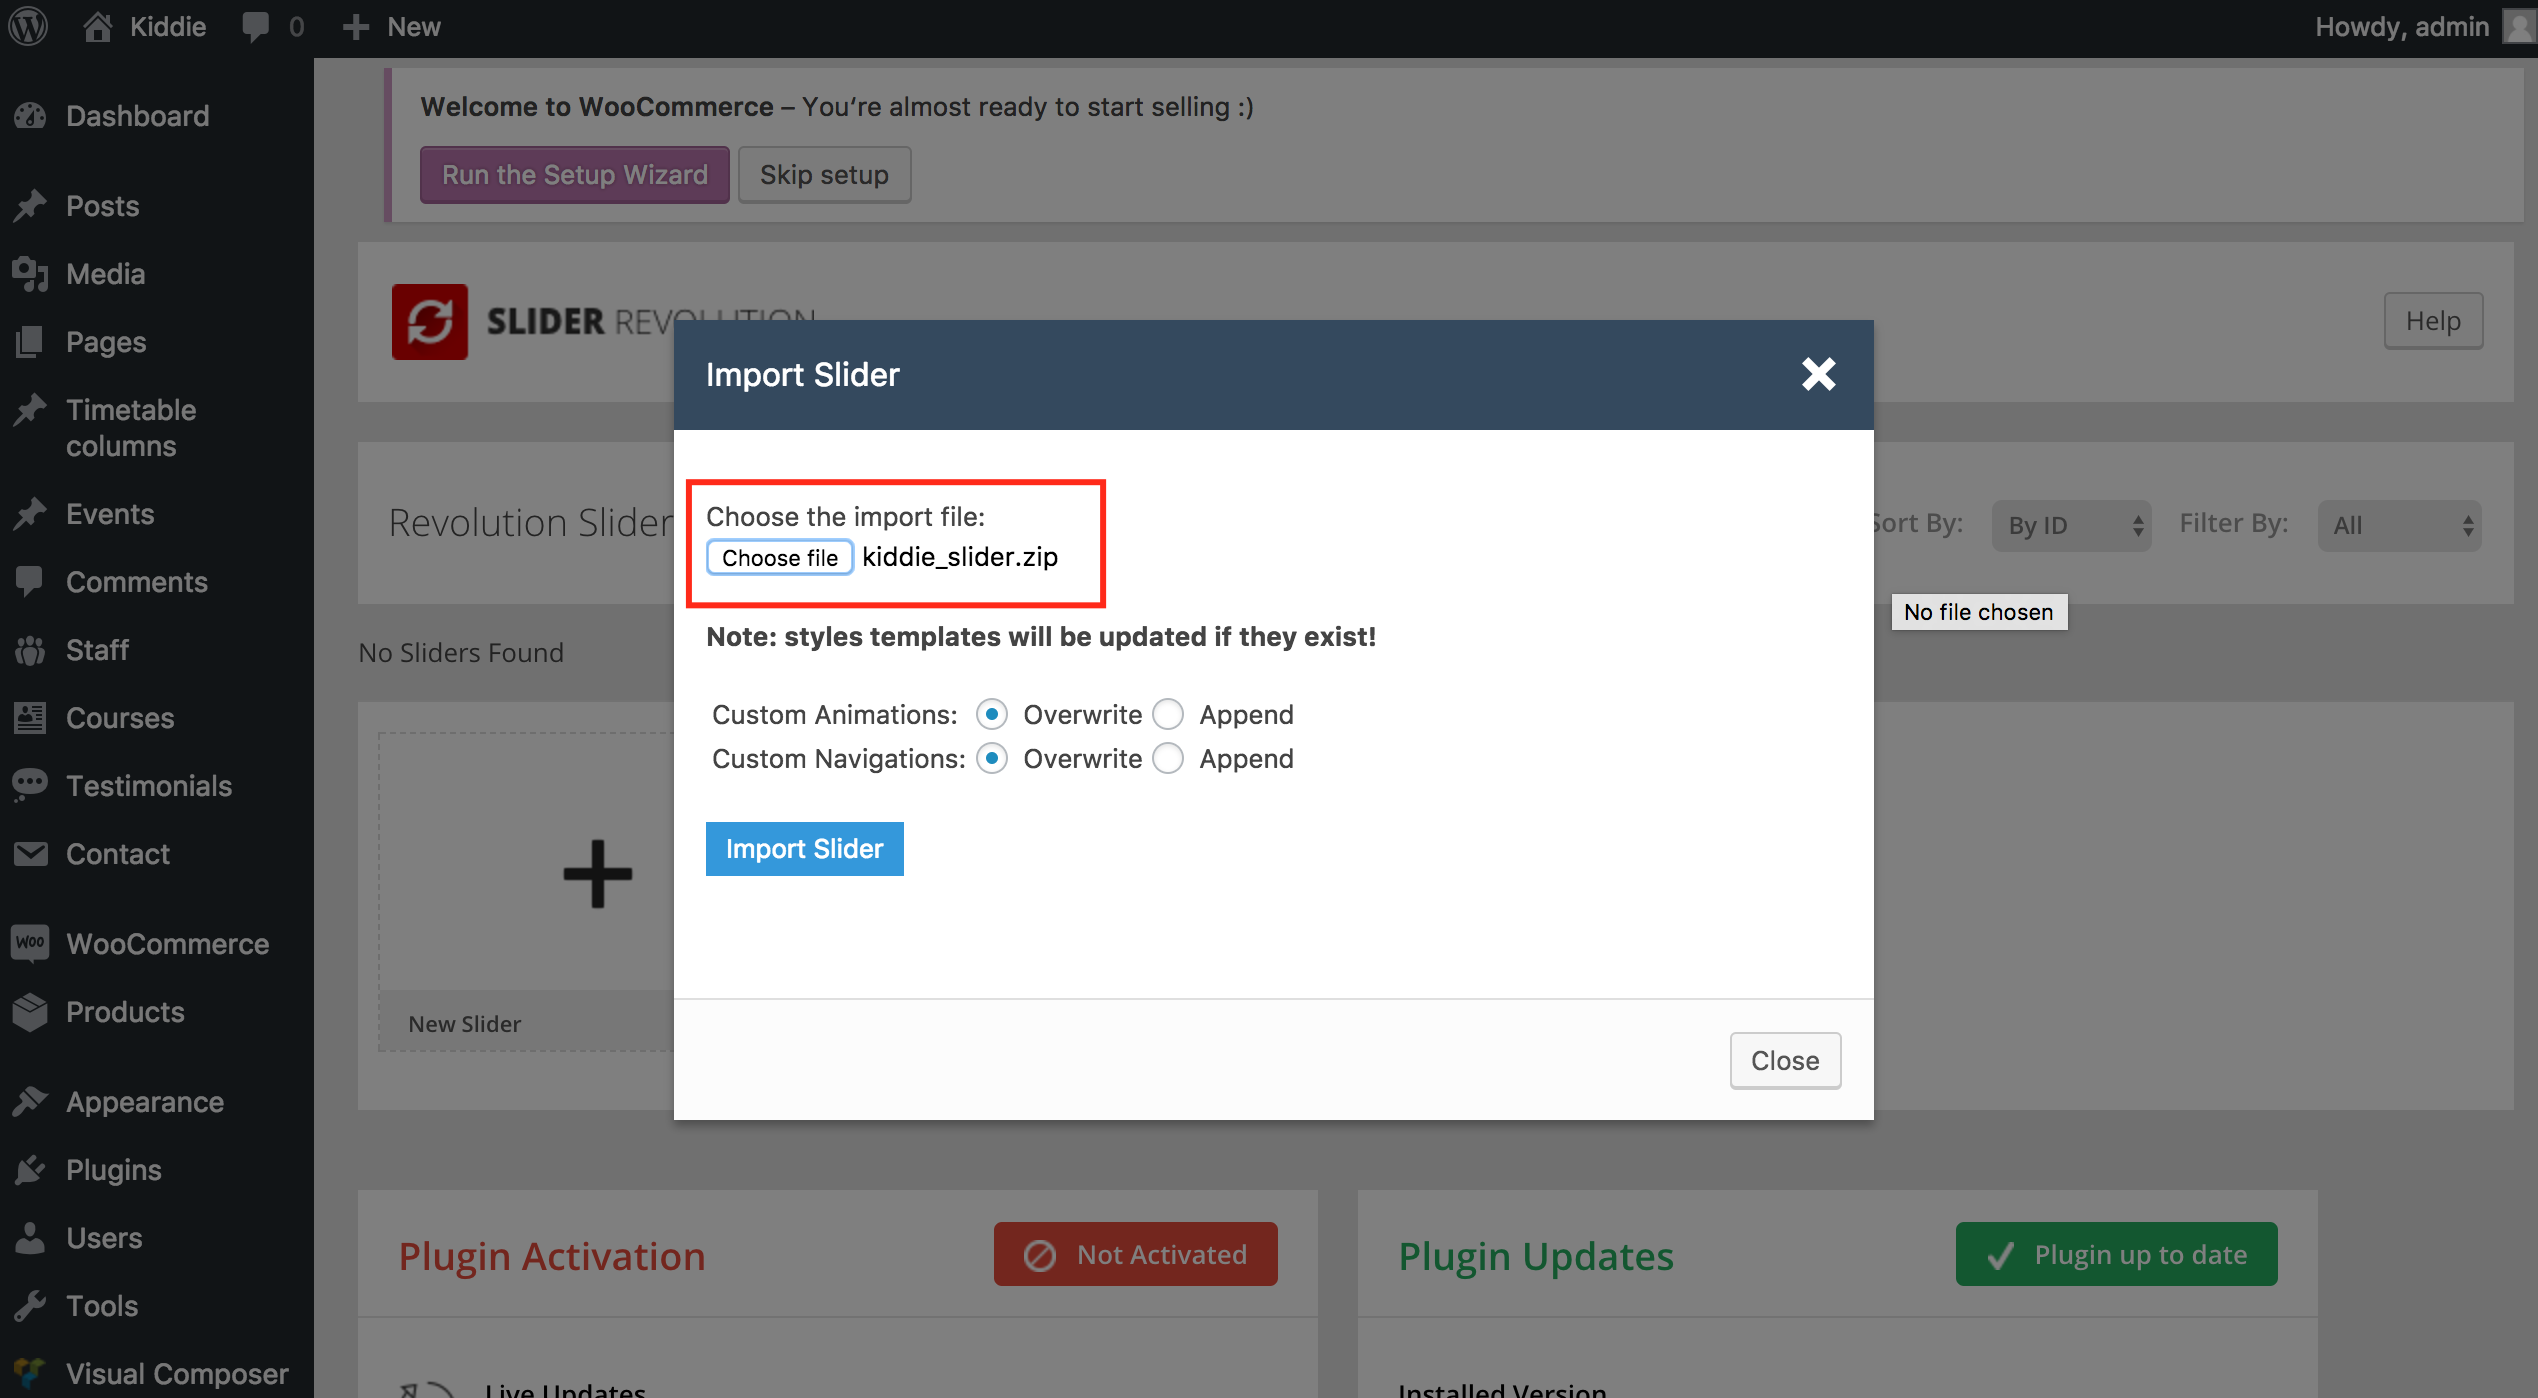
Upload kiddie_slider.zip from Slider folder and press Import Slider

-
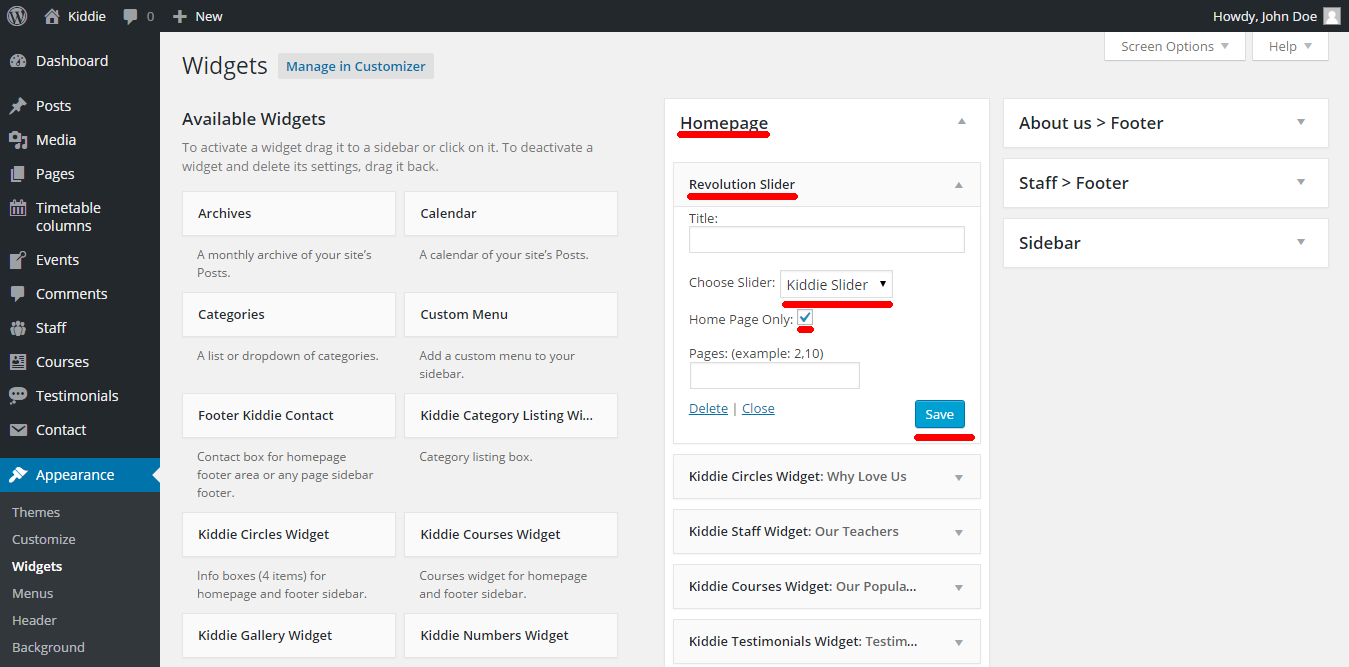
Once done return to Appearance > Widgets and add to Homepage sidebar the new available Revolution Slider Widget. Now your Widgets area should look like below.
Can I use the theme purchase code to activate slider revolution ?
Theme purchase code cannot be used for slider revolution activation and slider revolution author do not allow the theme authors like me to provide the extended license purchase code for plugin as part of the theme download package.
So, if you need to update slider revolution automatically OR you need to get some support related to slider revolution then you have to purchase it separately.
I will always try to provide the latest version of slider revolution plugin with a theme update. So, I do not recommend you to purchase it separately.
Thanks.
Set Up General Theme Features
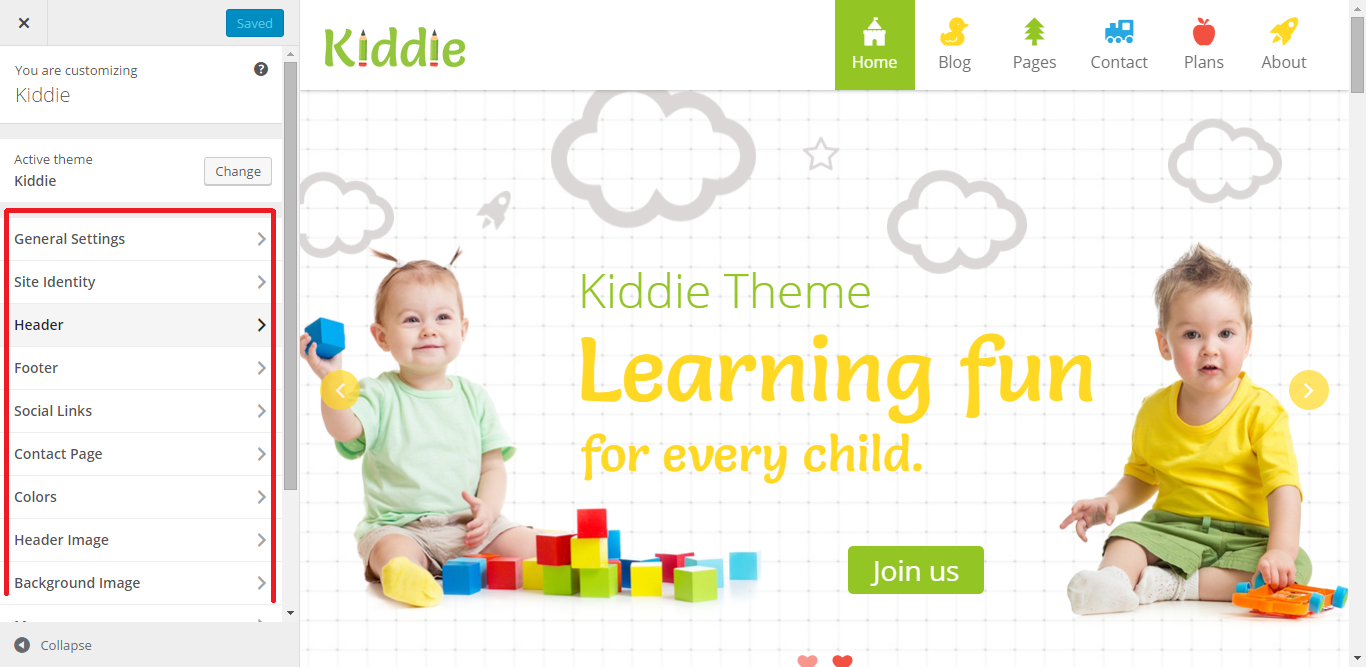
All customizations done in this theme are done via 'Customizer'. You will be able to test your changes before make them permanent.
To set up all this features go to WordPress Admin > Appearance > Customize and configure the related options. Hopefully all the options are easy to understand. Do not forget to save any changes you would like to go live with them.
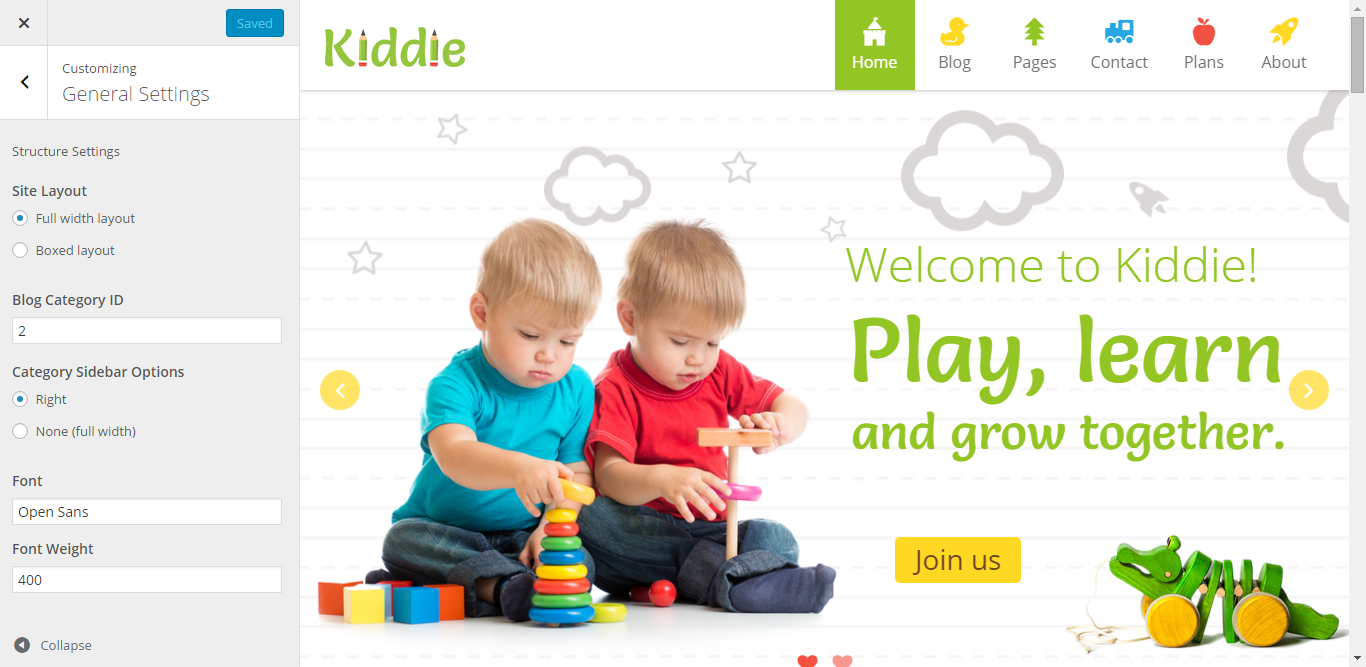
General Settings
In this area you can set website layout (boxed/full width), font family, font weight, sidebar.
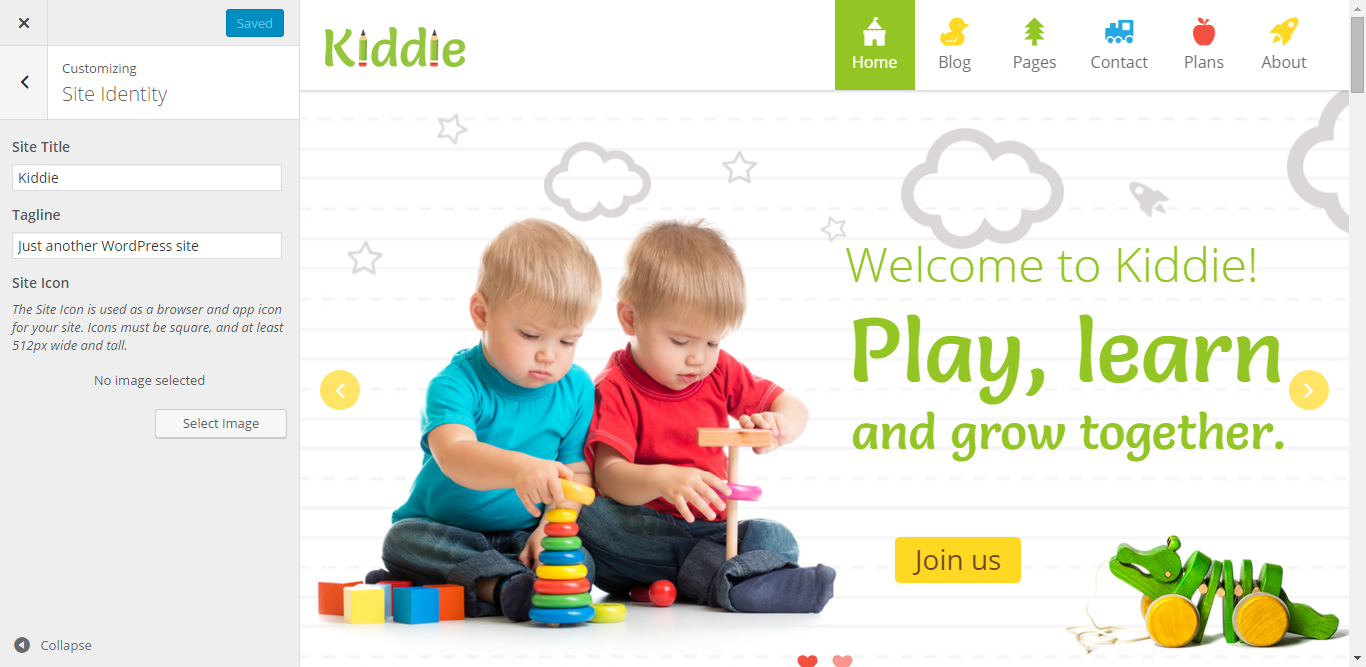
Site Identity
Picture below is self descriptive about settings in this area
Header
In this area you can configure: logo, logo width, fonts used in header area (can be other fonts then the fonts set in General Settings), background color for the header area, menu color, menu hover color.

Footer
Picture below is self descriptive about settings in this area

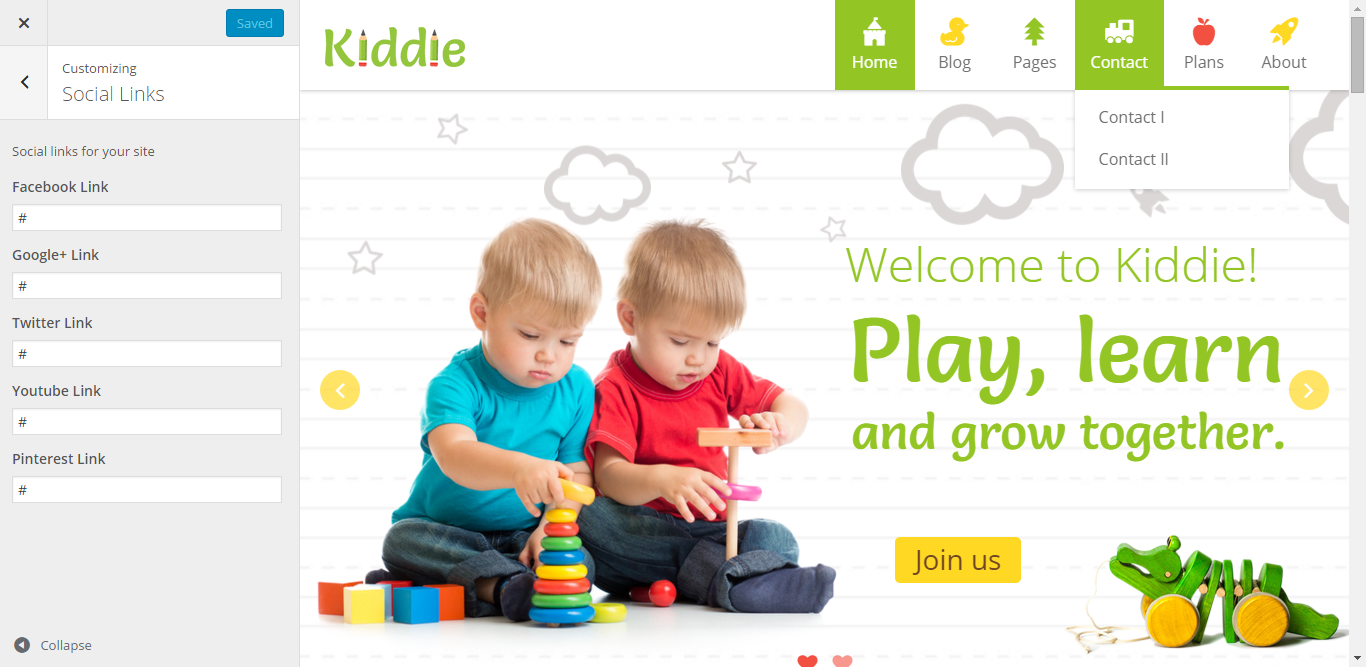
Social Links
Picture below is self descriptive about settings in this area. If you empty any field the corresponding icon will be hidden.
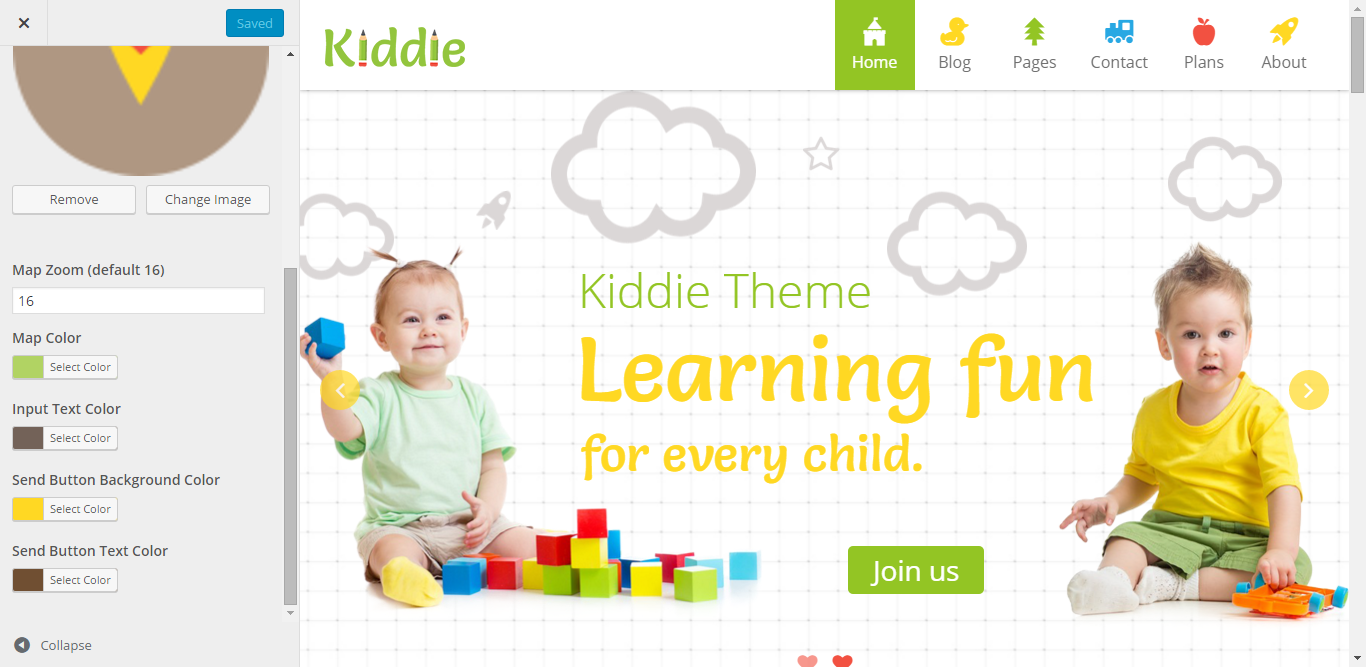
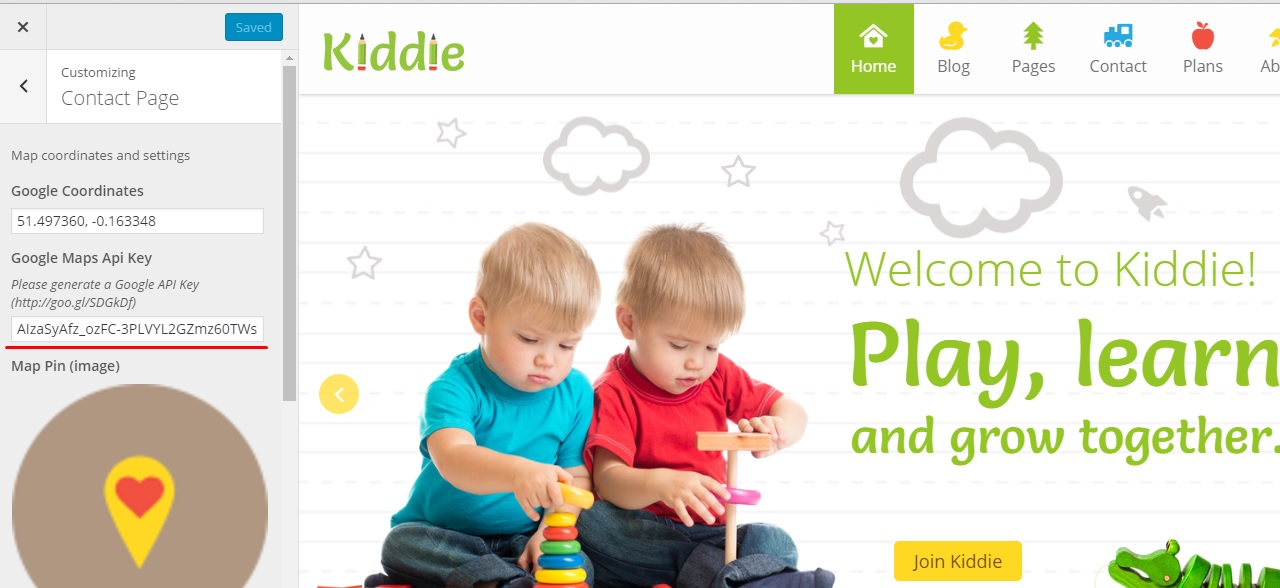
Contact Page
In this area you can set the coordinates for your place, map colors, map zoom, map pin.
Google Maps API Key
In this area you have to add your google API key. You can use the pre generated key if you want but you are shareing it with others and it has a limit of 25000 maps views per day. To generate a personal key follow this link Generate Google Maps API Key
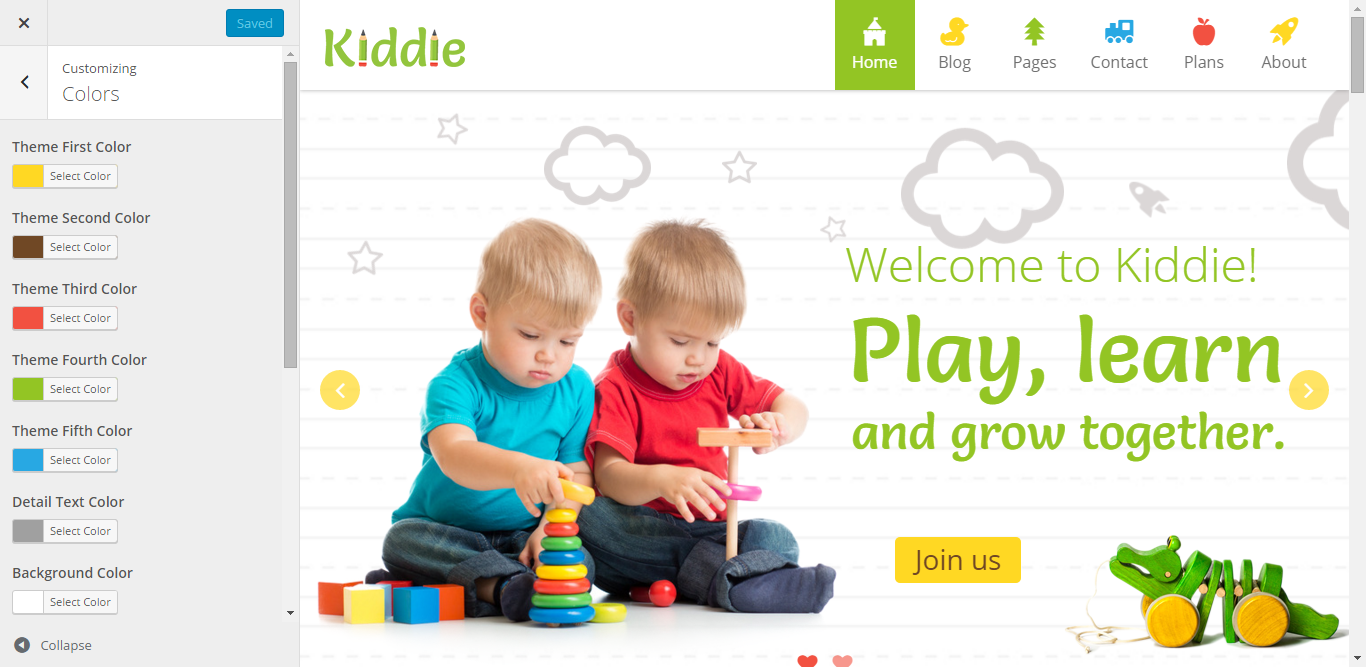
Colors
In this area you can theme colors. You have 4 main colors used in different places. We recommend you to keep no more then 4 colors if possible. You can also set title color, navigation color, links color and many other colors for different items.
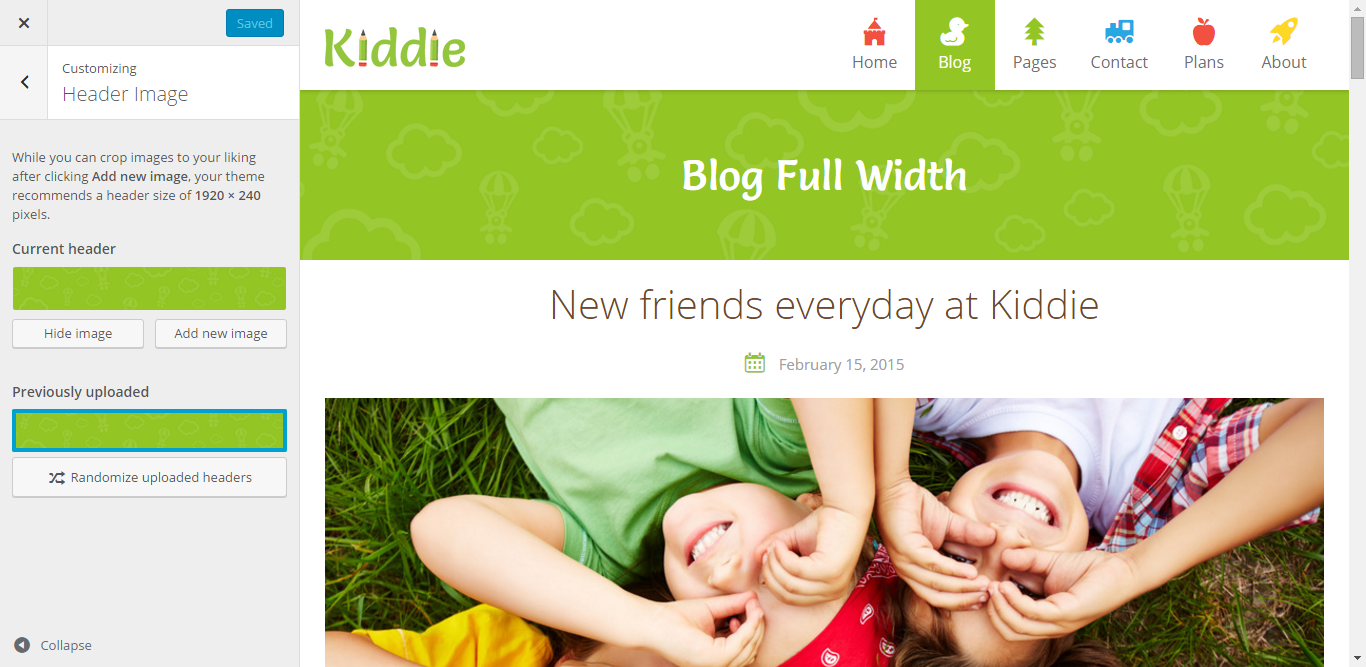
Header Image
In this area you can set header images for categories and pages. Please note that pages have their own switch for header images.
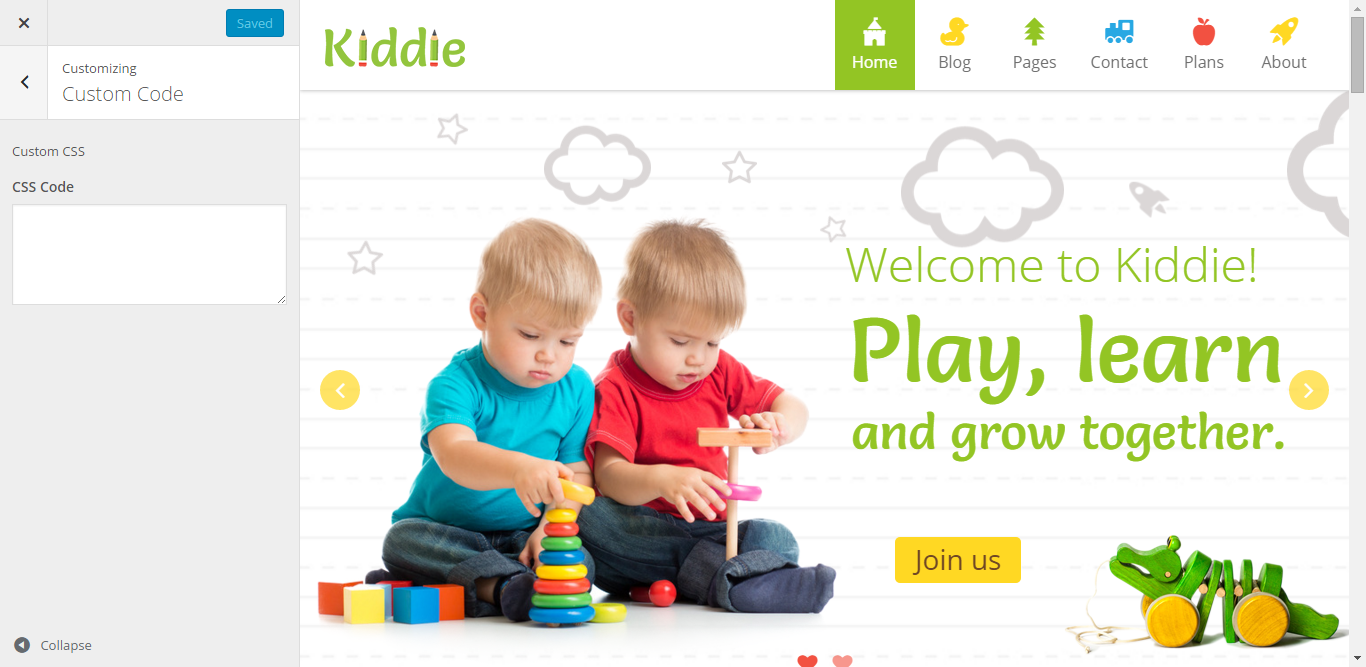
Custom Code
In this area you can add your own quick CSS rules.
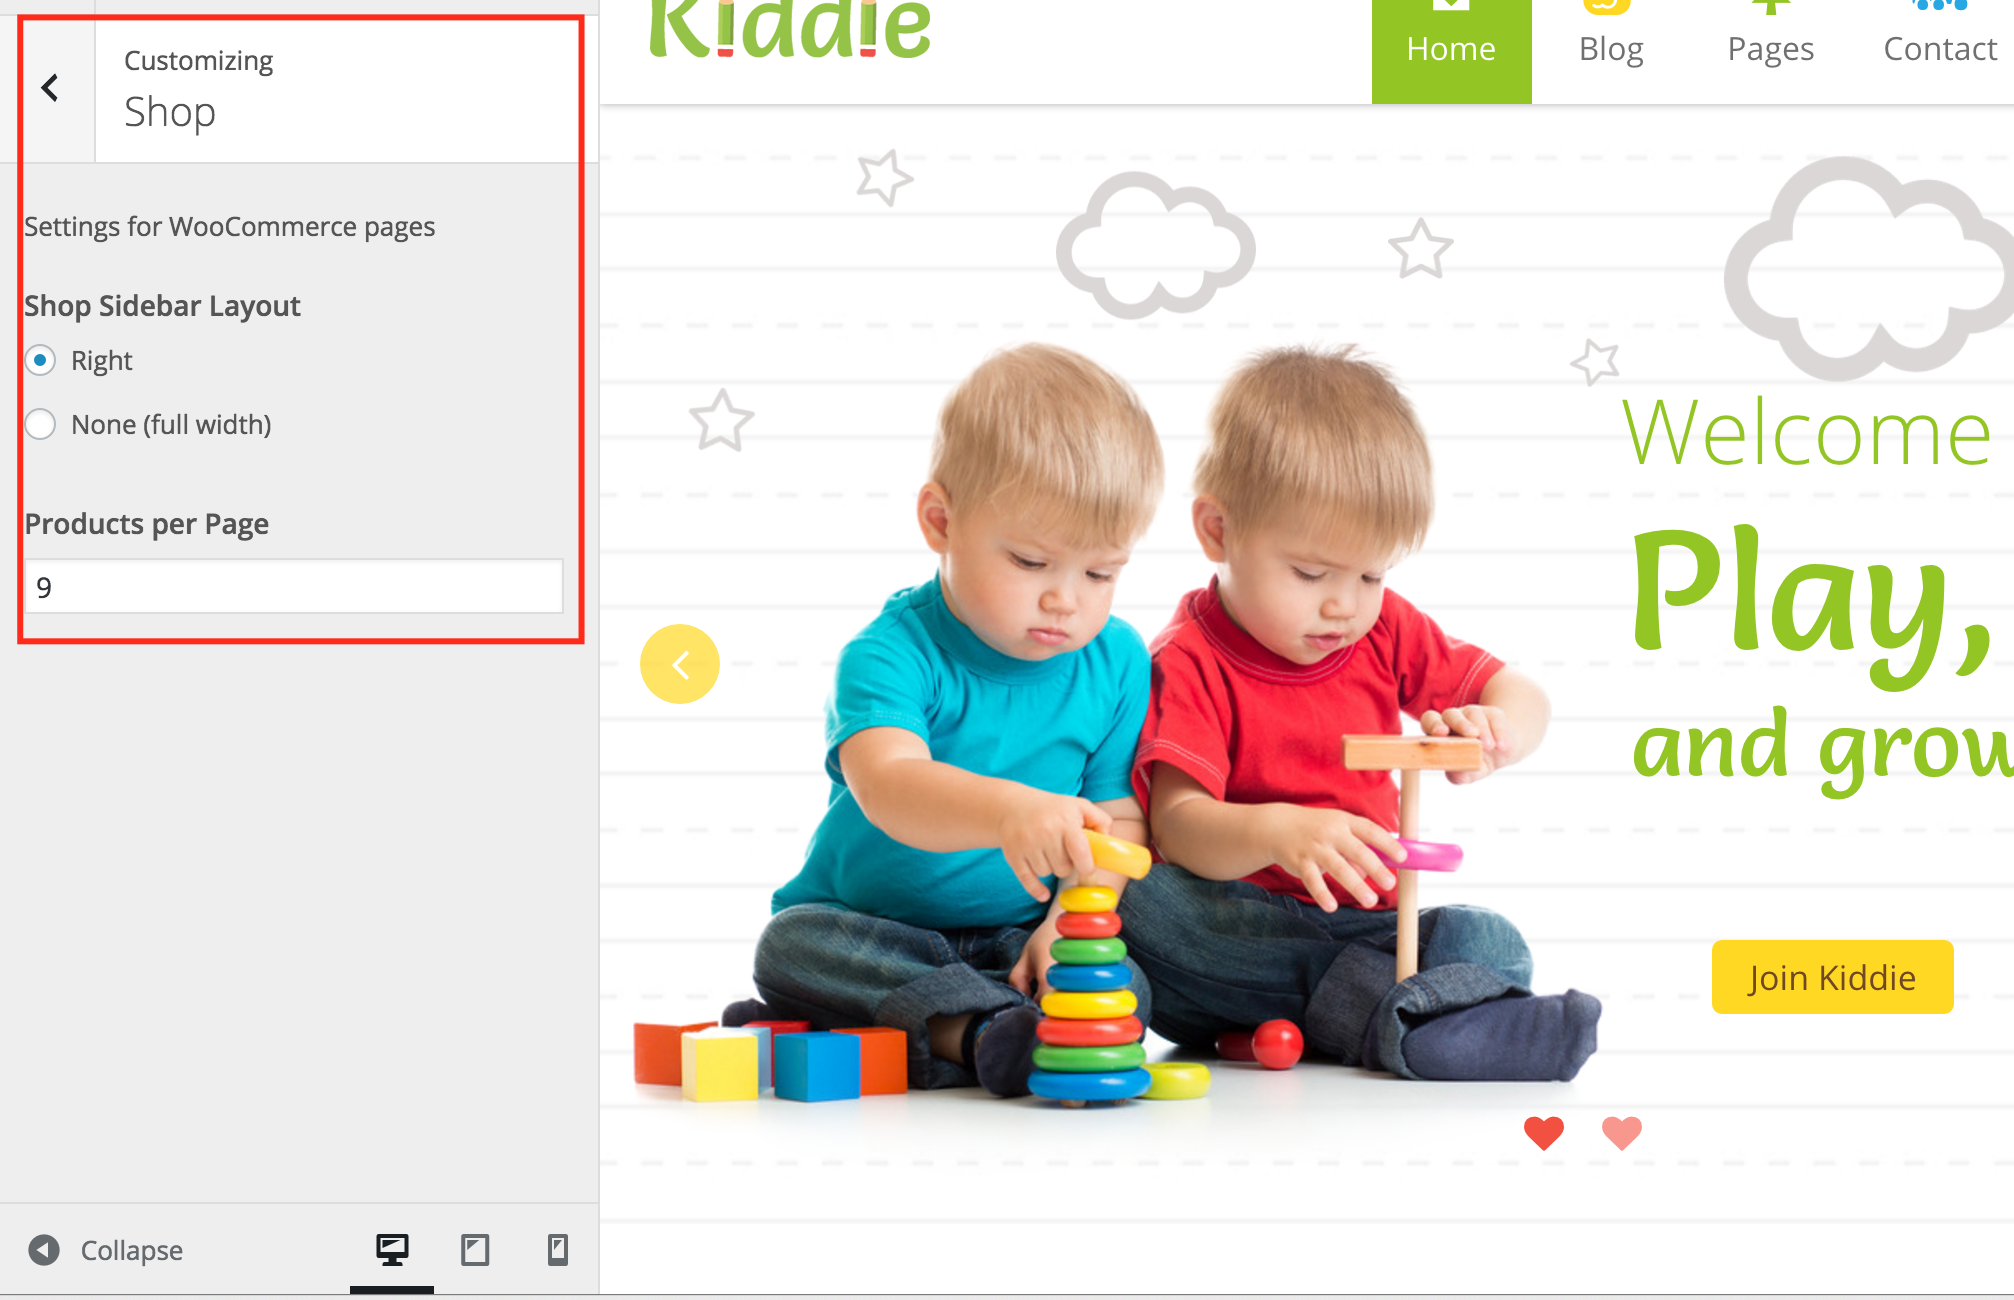
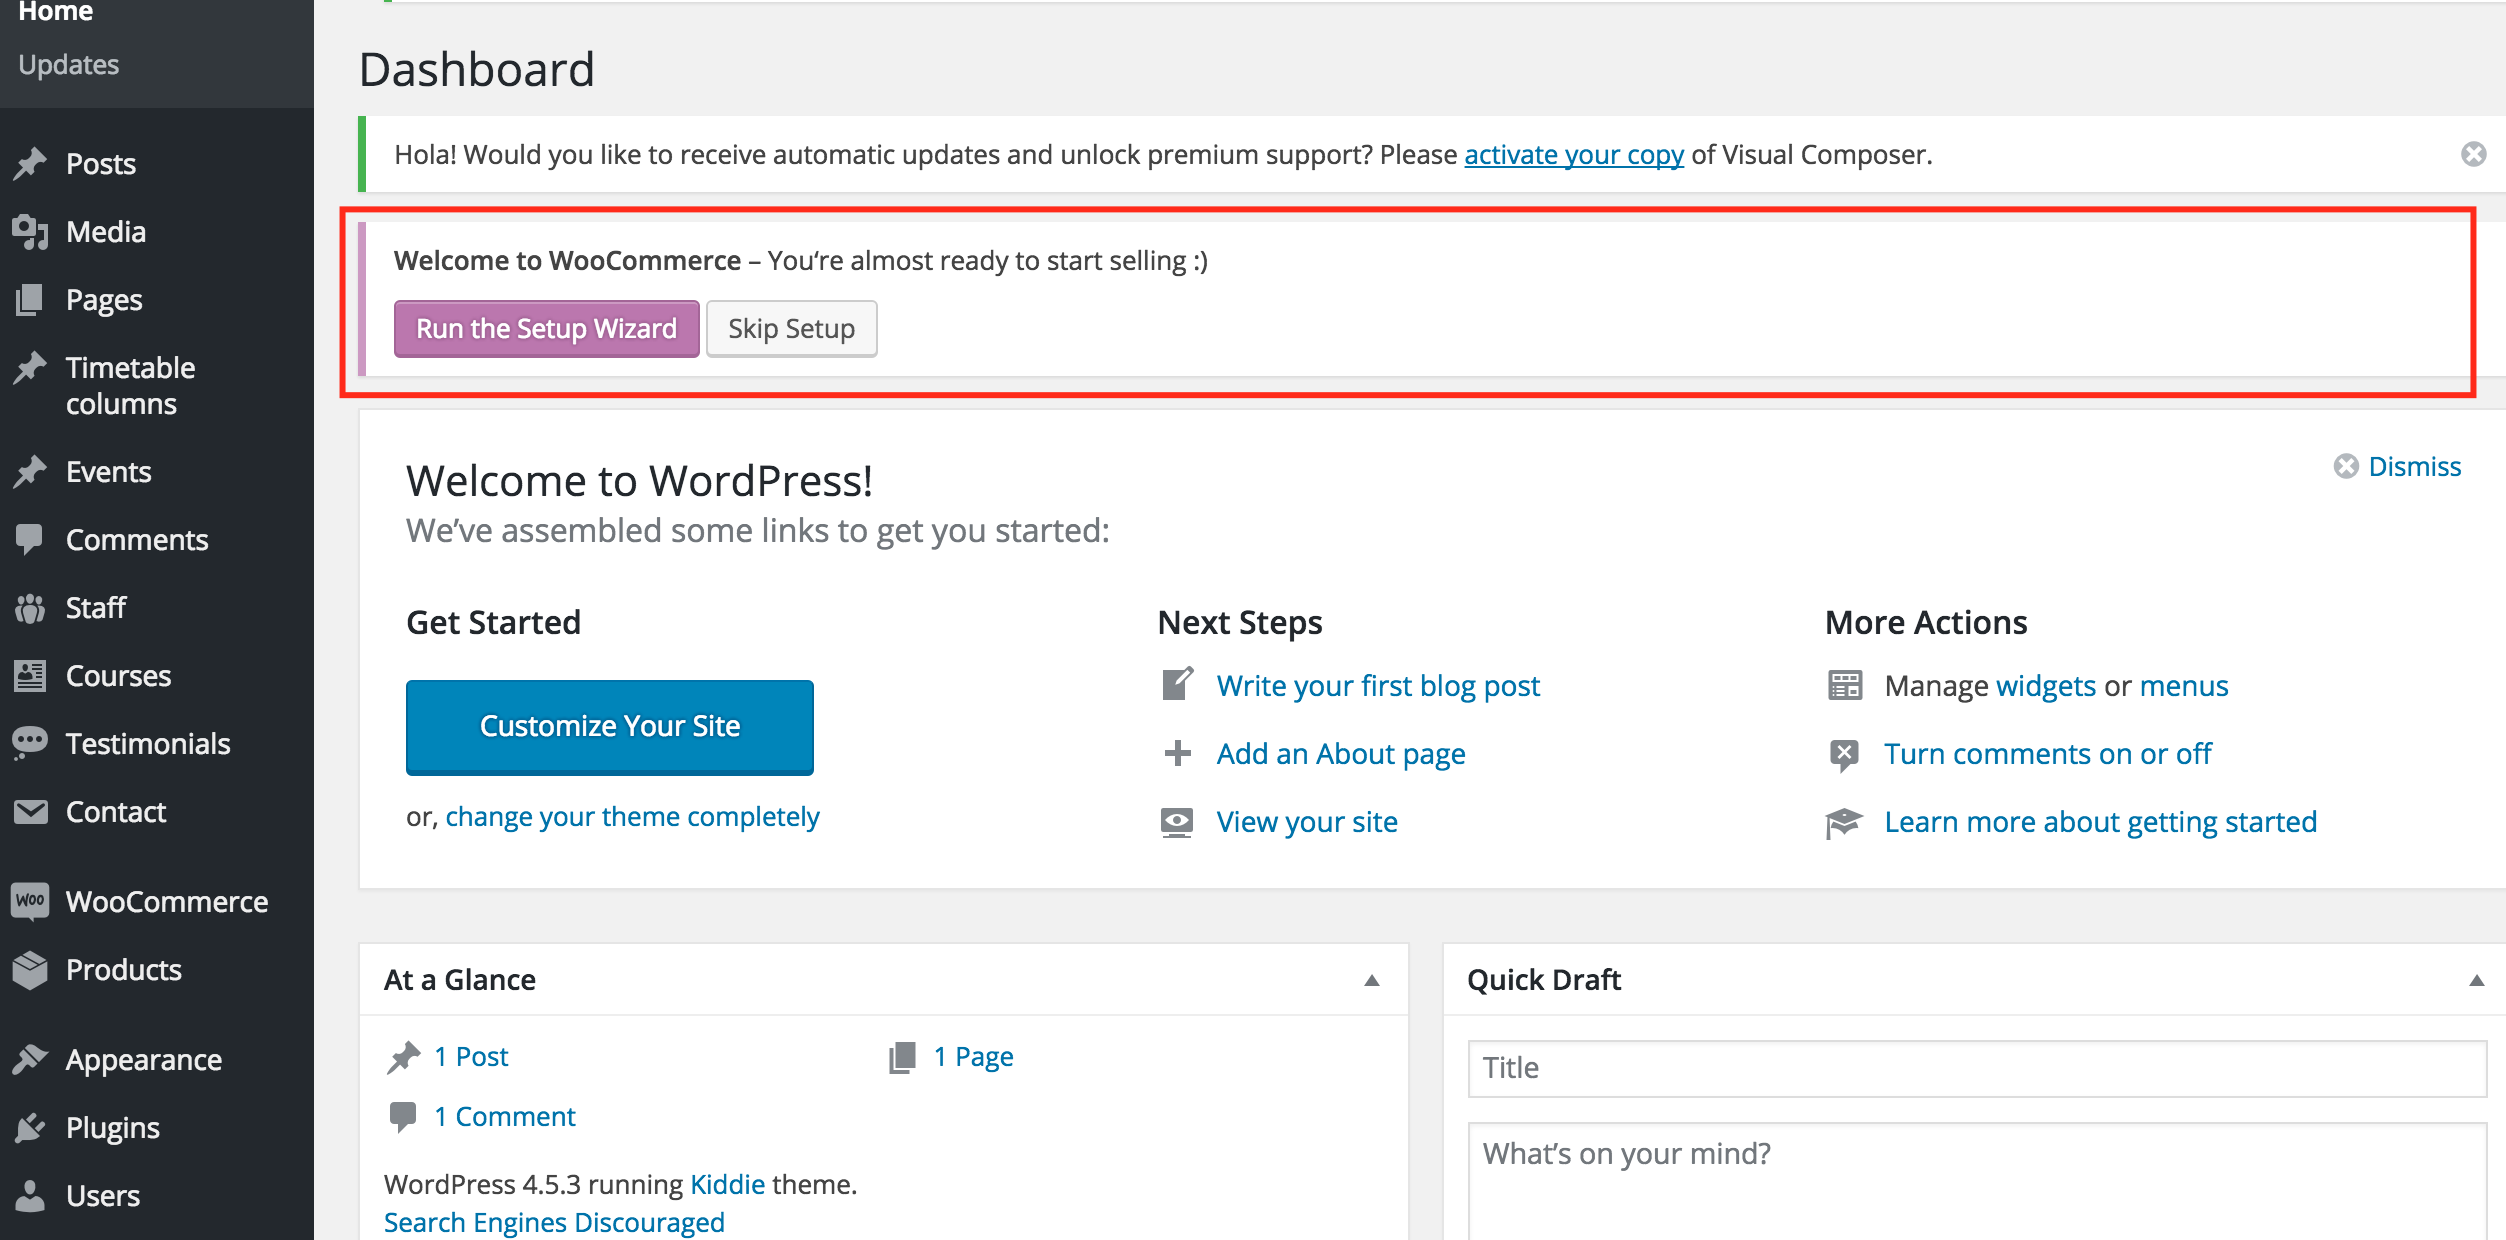
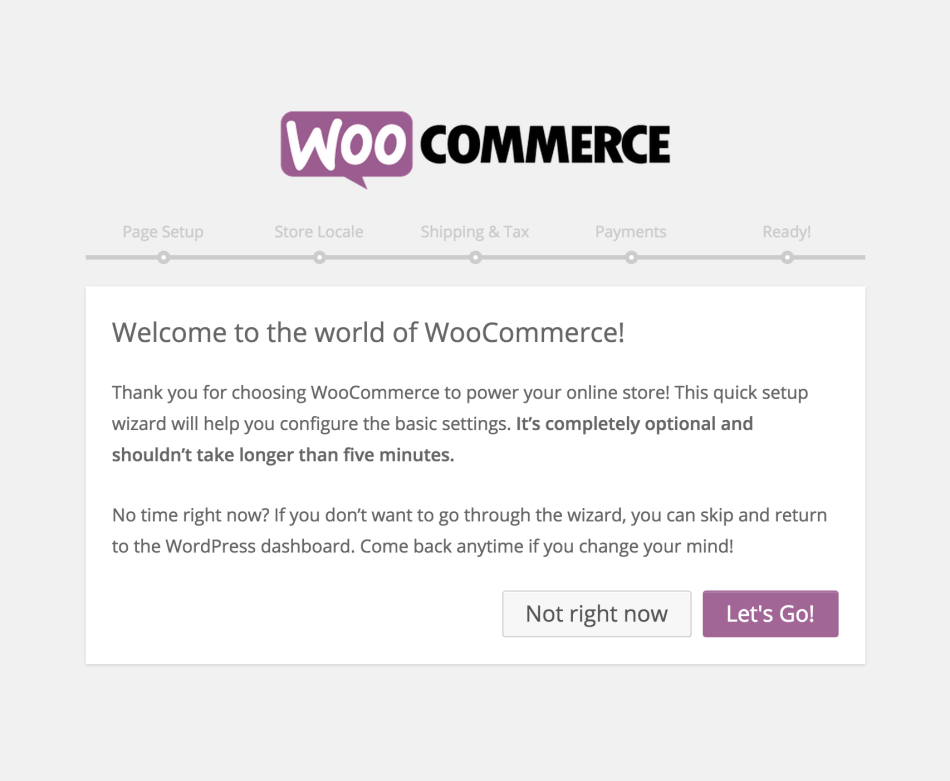
Set Up Woocommerce
Settings regarding the WooCommerce Store are located in the "Customizer Area"
To set up all store sidebar go to WordPress Admin > Appearance > Customize and configure the related options. Hopefully all the options are easy to understand. Do not forget to save any changes you would like to go live with them.
Updateing from an older version
Please make a backup before going to the next step!!!
If you have an older version of Kiddie that has no WooCommerce integration all you need is to override the theme files and run the WooCommerce wizard. This will setup general things and also will create default WooCommerce pages. More information about things you need to take in cosideration when you setup your store can be found here: WooCommerce Onboarding Wizard
Set Up Visual Composer
Go to WordPress Admin > Visual Composer > Role Manager
By default Visual Composer lets you edit pages only
To be able to modify any posts, custom posts like staff or course you should make the following changes in Roles Manager tab.
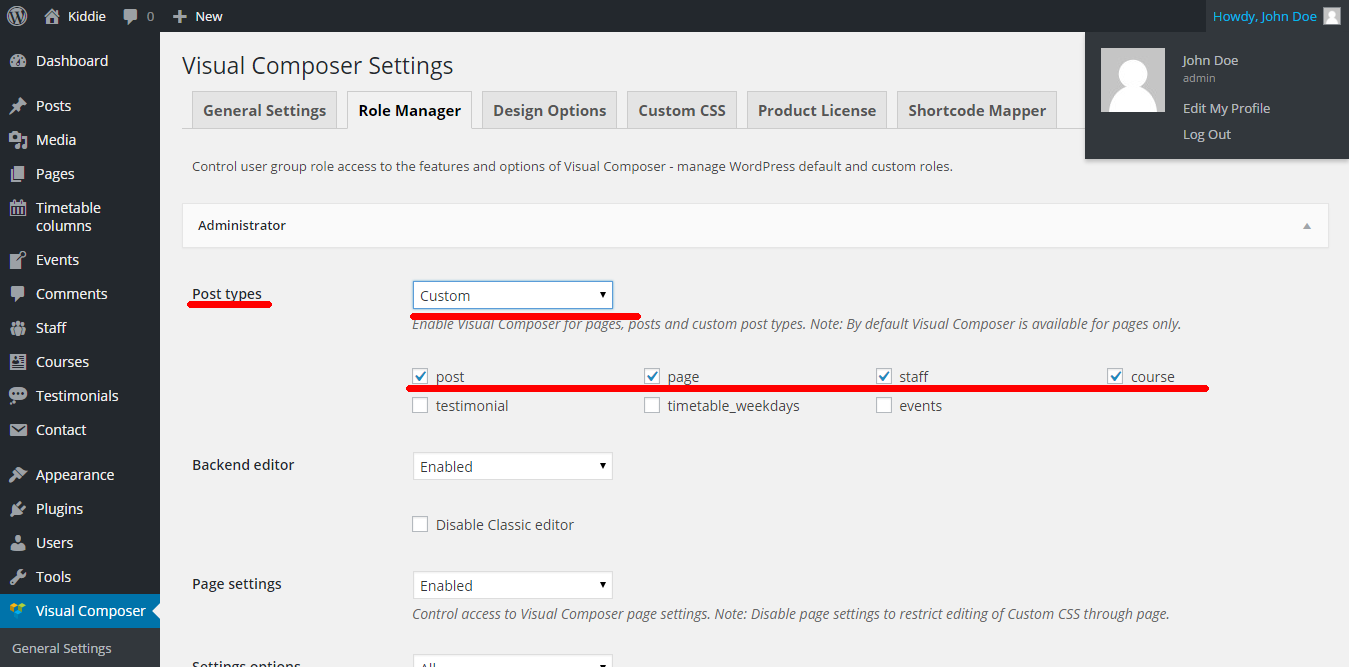
Save the changes after.
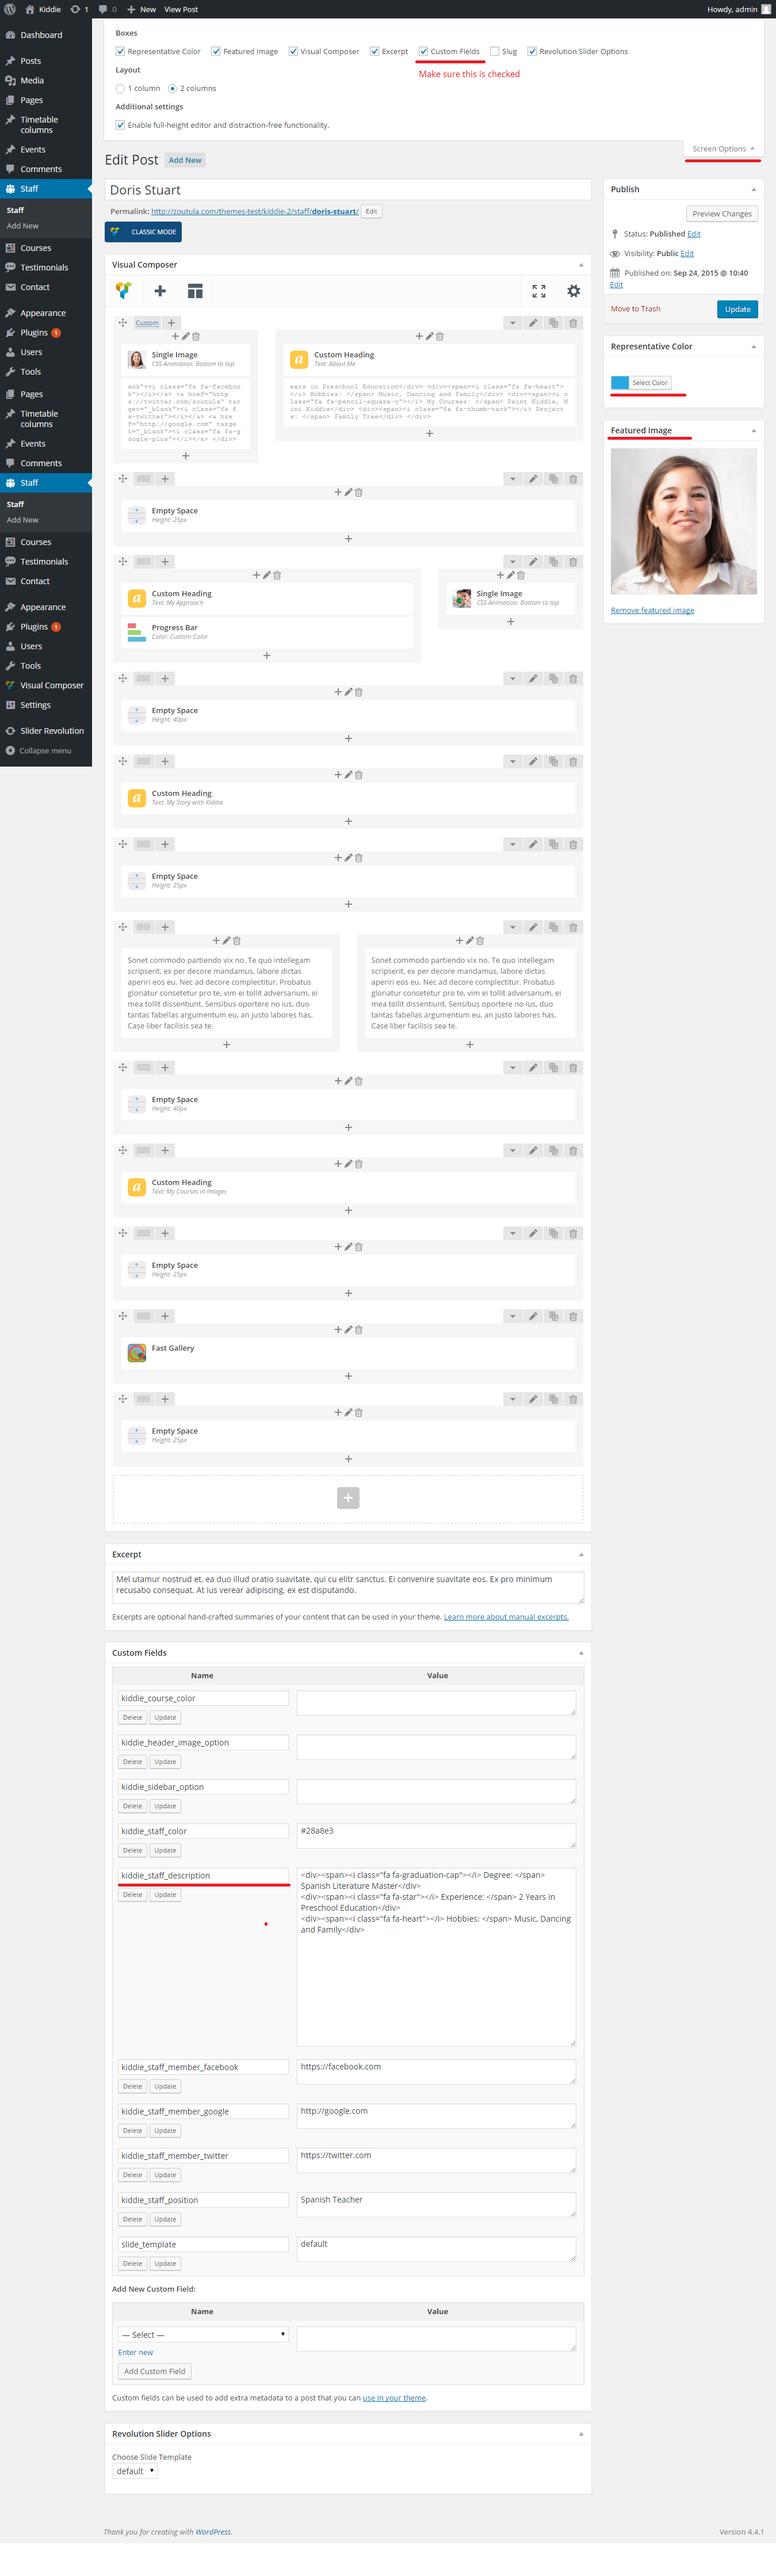
Add Staff Member
In case of imported XML the this type of content already exists. You only need to change it to fit your needs.
Go to WordPress Admin > Staff > Add New- Provide staff member name
- Enter the staff member contents or just copy/past one of the predefined staff member post and change the existing content.
- Provide the featured image. The image should be a square if possible with width and height more then 800px.
- Provide excerpt for post, this will be used on staff listing page
- Add custom fields content see image below
- The custom field kiddie_staff_description it's a special field which contains the member HTML short description. It should be something like below.
    <div><span><i class="fa fa-graduation-cap"></i> Degree: </span>  Spanish Literature Master</div>
    <div><span><i class="fa fa-star"></i> Experience: </span> 2 Years in Preschool Education</div>
    <div><span><i class="fa fa-heart"></i> Hobbies: </span> Music, Dancing and Family</div>
You can change any icon. This area uses FontAwesome Icons.
- Publish the post once it is ready.
Add Course
In case of imported XML the this type of content already exists. You only need to change it to fit your needs.
Go to WordPress Admin > Courses > Add New- Provide the course name
- Enter the text contents about course
- Provide the featured image.
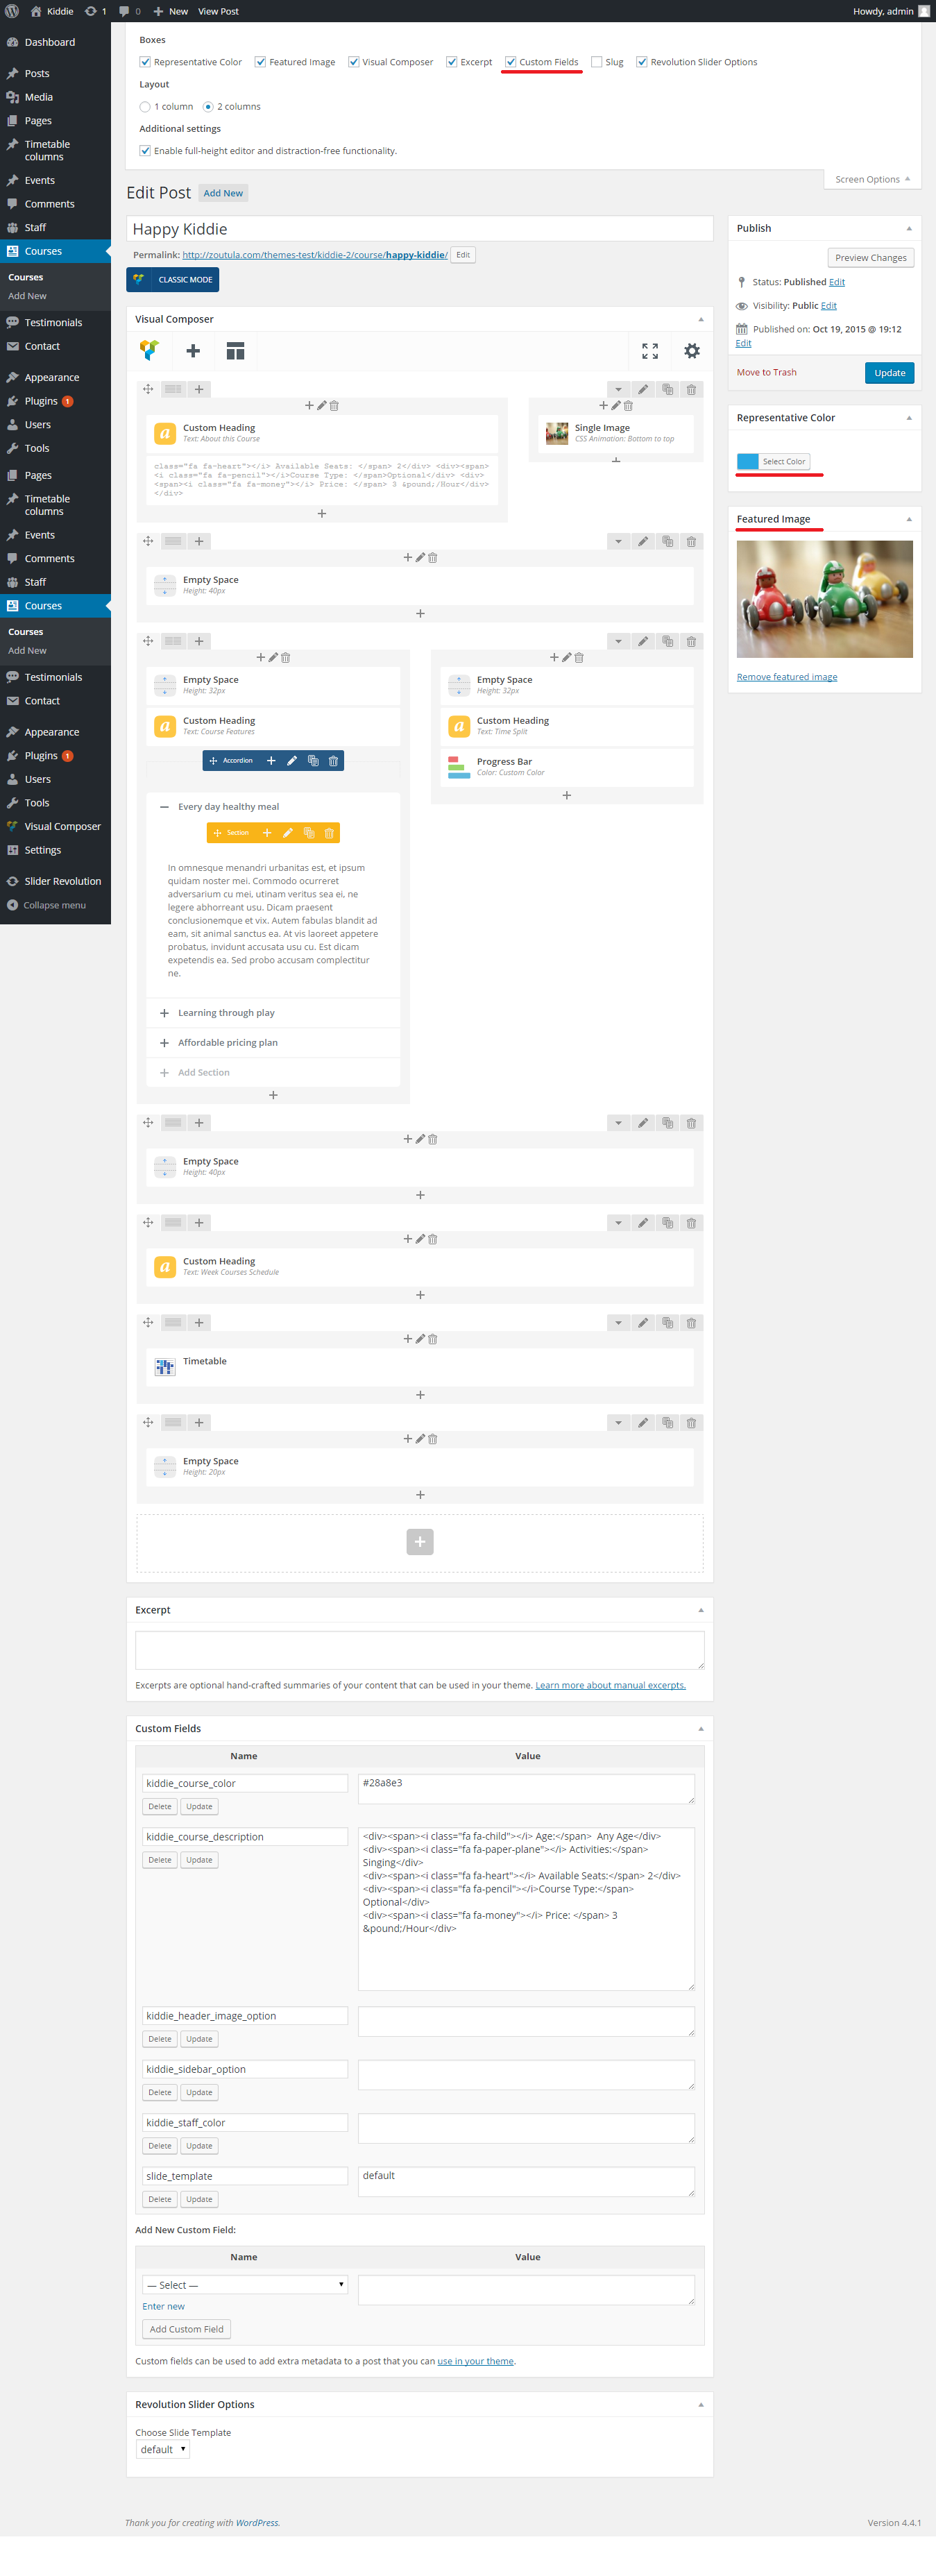
- Provide the course related information. Some custom fields should be filled with data (kiddie_course_color -> HEX color specific to current course, kiddie_course_description -> HTML short description of the course used in listing and course post)
<div><span><i class="fa fa-child"></i> Age:</span> Any Age</div> <div><span><i class="fa fa-paper-plane"></i> Activities:</span> Singing</div> <div><span><i class="fa fa-heart"></i> Available Seats:</span> 2</div> <div><span><i class="fa fa-pencil"></i>Course Type:</span> Optional</div> <div><span><i class="fa fa-money"></i> Price: </span> 3 £/Hour</div> - Publish/Update the course post once it is ready.
Add Testimonial
In case of imported XML the this type of content already exists. You only need to change it to fit your needs.
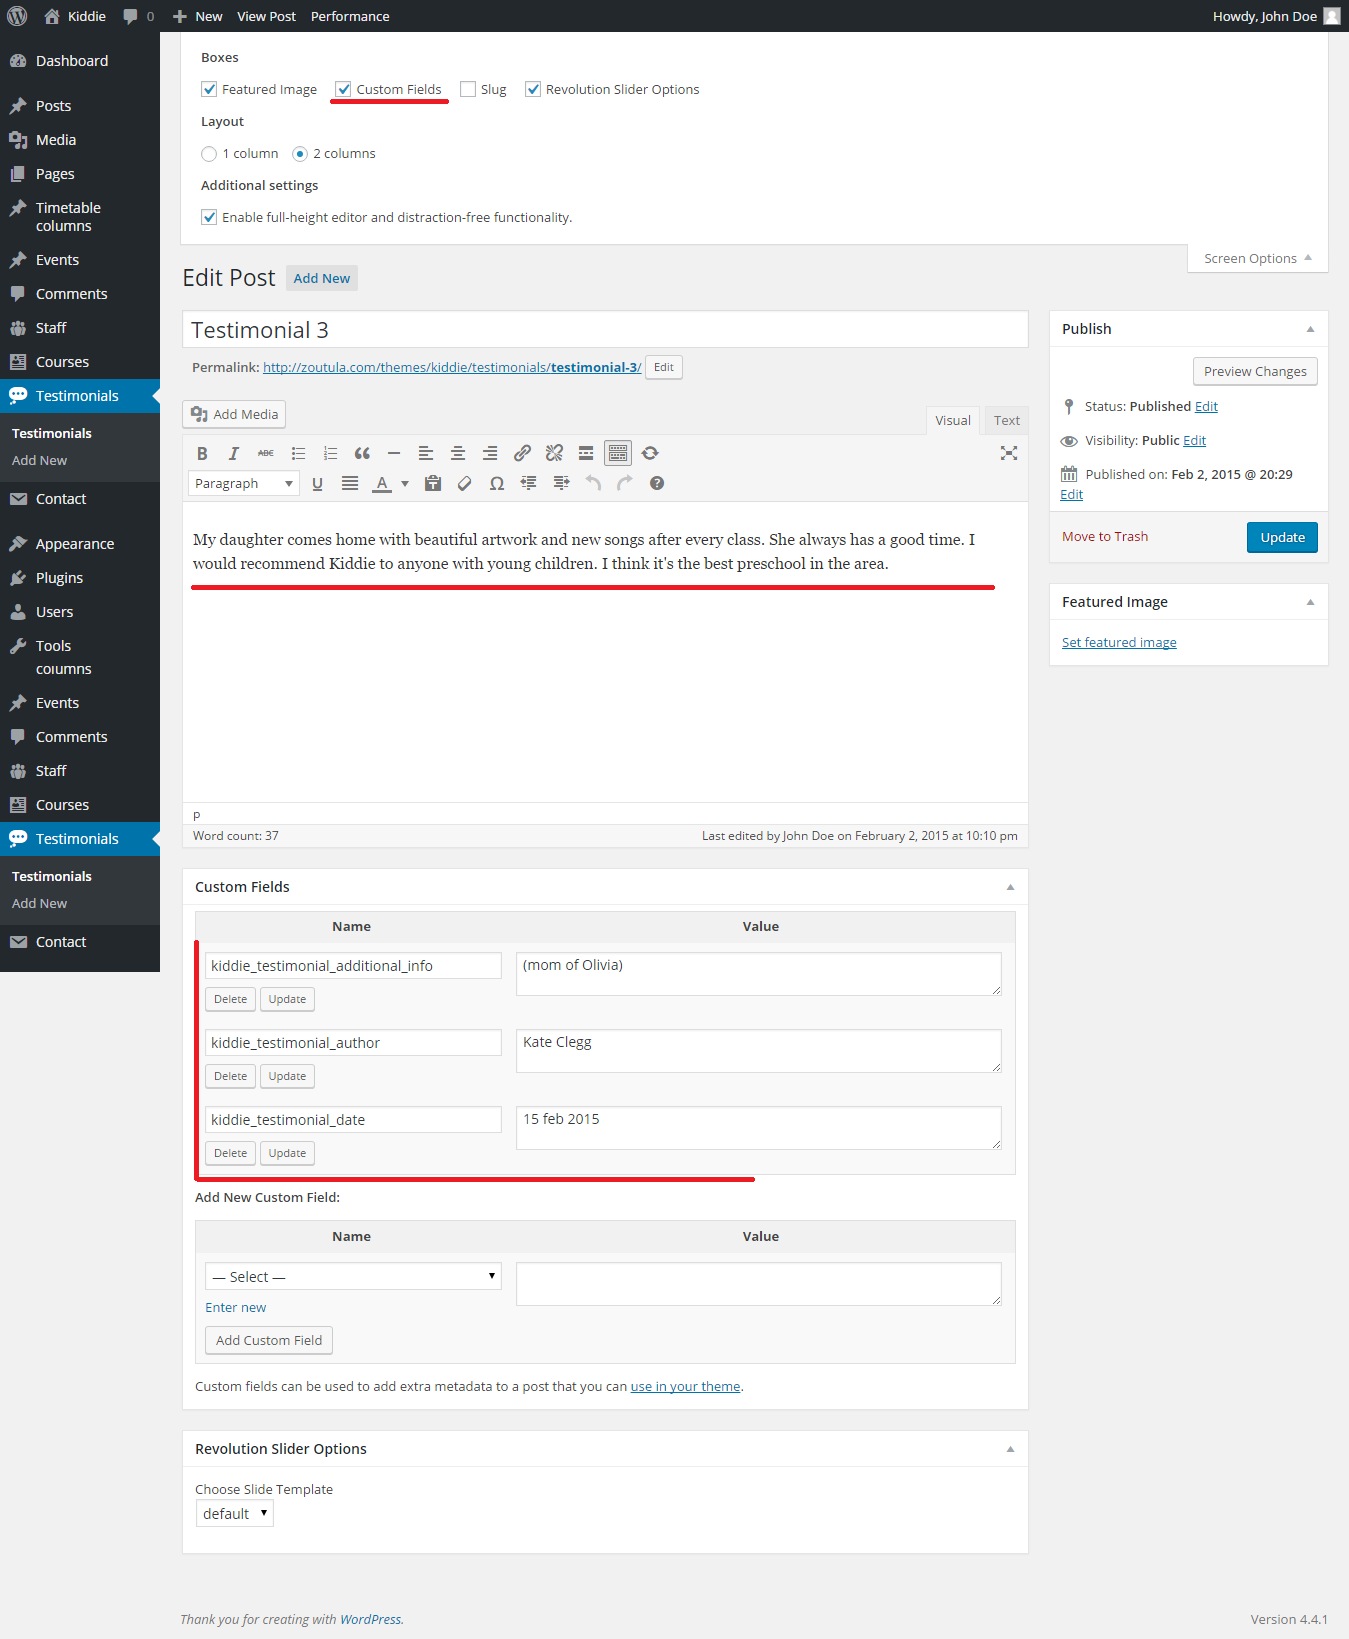
Go to WordPress Admin > Testimonials > Add New- Testimonials are used only by testimonials widget
- Add testimonial text
- Add custom field data for your testimonial
Add/Edit Gallery Page
In case of imported XML the this page is already created. You only need to change it to fit your needs.
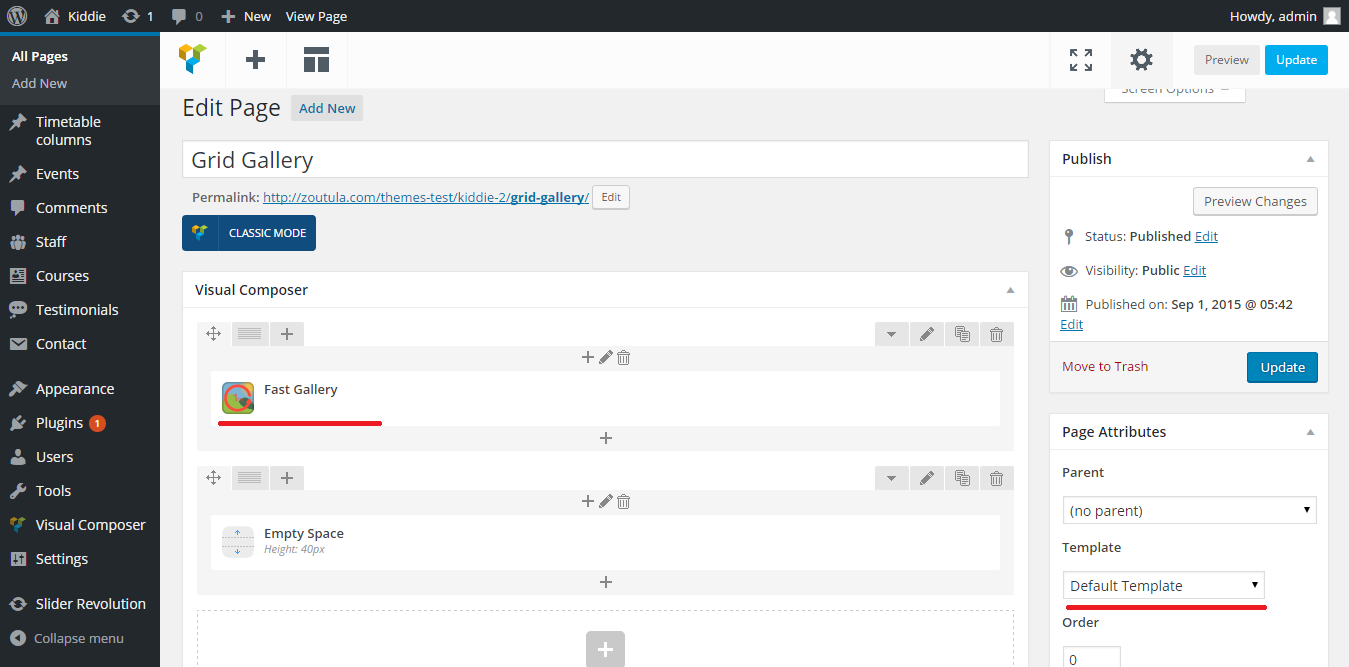
Go to WordPress Admin > Pages > Add New- Provide the page title
- Select the default template.
- Edit page with Visual Composer -> Add Element Fast Gallery
- We're using a premium plugin for Visual Composer in order to create more then 6 gallery types and 200 effects.
You can find details here Fast Gallery for Visual Composer Plugin
- Publish the page once it is ready.
- After publishing you need to add the newly created page in menu from WordPress Admin > Appearance > Menus
Add/Edit Pricing Plan Page
In case of imported XML the this page is already created. You only need to change it to fit your needs.
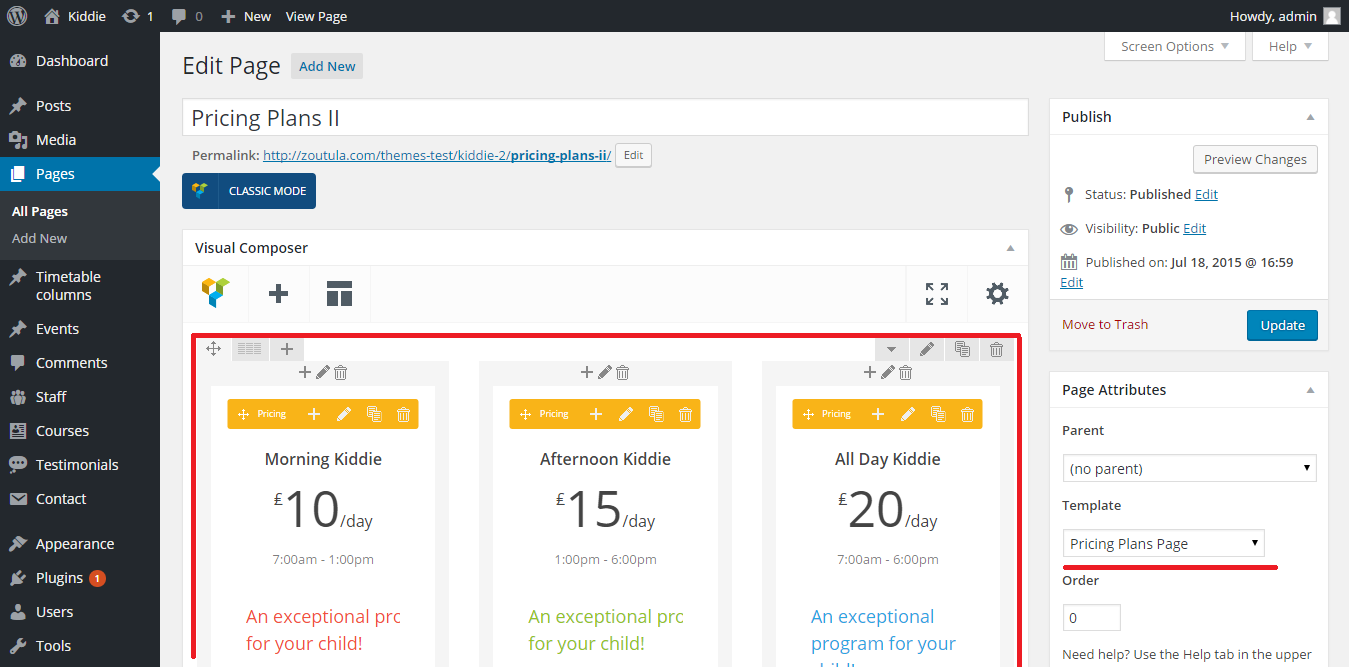
Go to WordPress Admin > Pages > Add New- Provide the page title
- Select the appropriate page template which is Pricing Plan Page.
- Edit page with Visual Composer -> Add Element Pricing
- We're using a premium plugin for Visual Composer in order to create all the pricing boxes.
You can find details here Pricing Boxes for Visual Composer Plugin
- Publish the page once it is ready.
- After publishing you need to add the newly created page in menu from WordPress Admin > Appearance > Menus
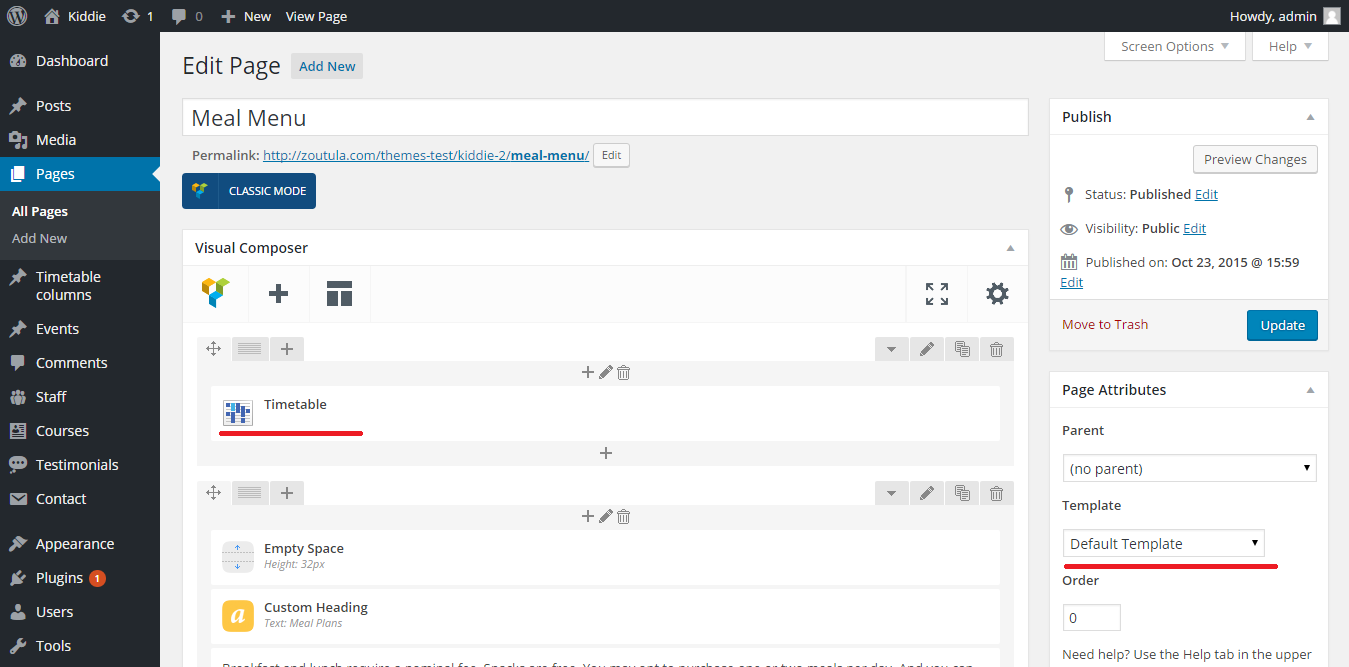
Add/Edit Meal Menu Page
In case of imported XML the this page is already created. You only need to change it to fit your needs.
Go to WordPress Admin > Pages > Add New- Provide the page title
- Select the appropriate page template which is Default template.
- Edit page with Visual Composer. This particular page uses a premium plugin Timetable. This plugin create the responsive meal menu table. You can create a lot of variants of meal menu. More about this plugin here Timetable Plugin of just read the documentation inside plugin folder kiddie.zip > plugin-activision > plugins > timetable.zip
- Publish the page once it is ready.
- After publishing you need to add the newly created page in menu from WordPress Admin > Appearance > Menus
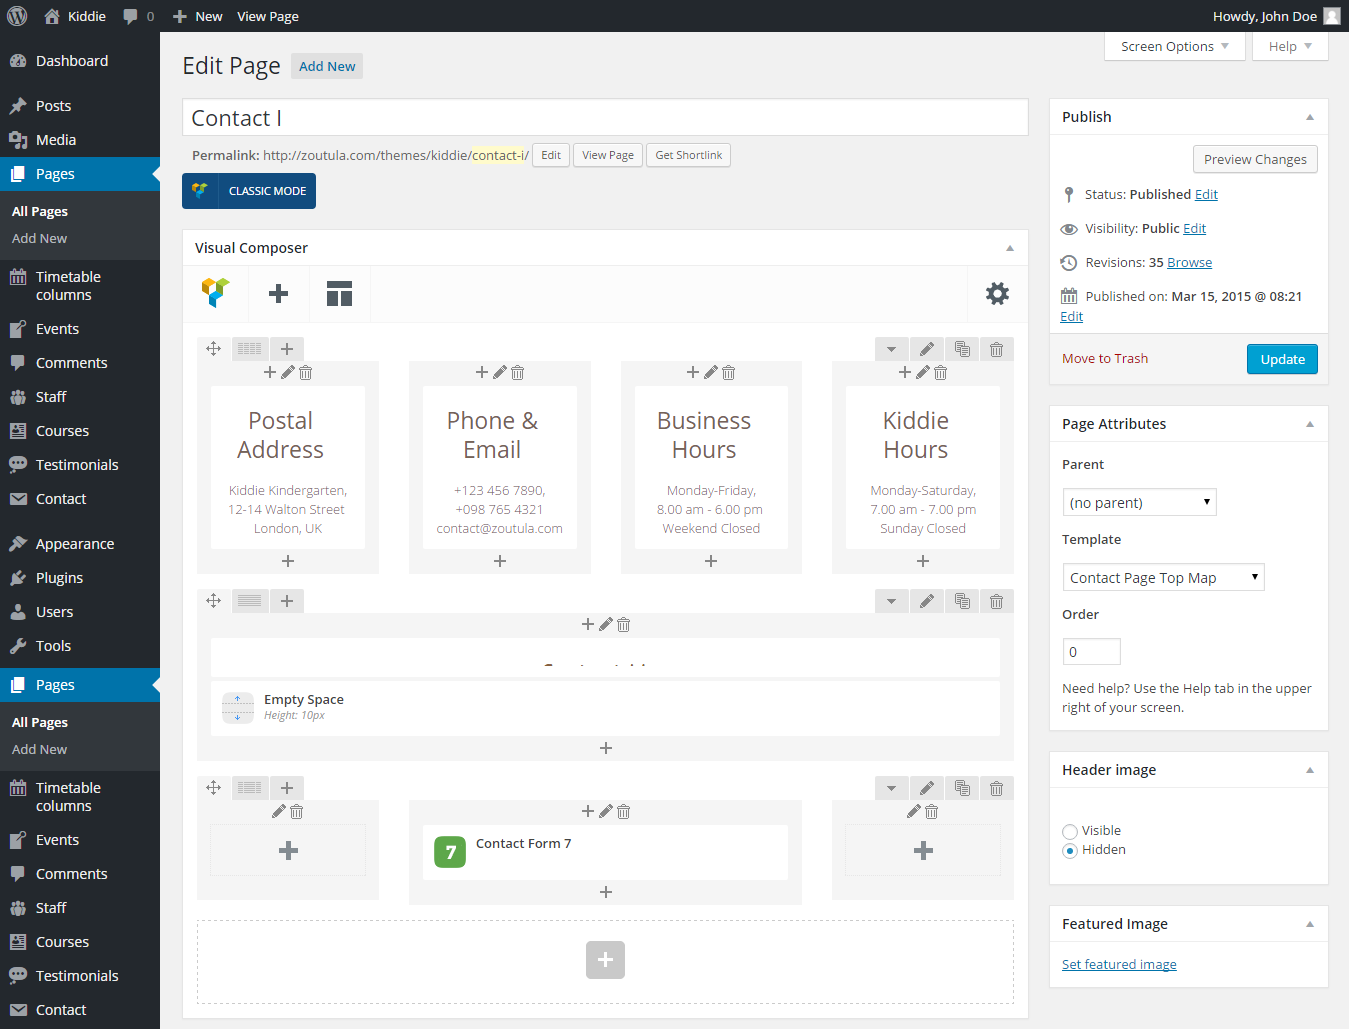
Add/Edit Contact Page
In case of imported XML the this page is already created. You only need to change it to fit your needs.
If you want to create your own contact page go to WordPress Admin > Pages > Add New
- Provide the page title
- Select the appropriate page template for contact.
There are 2 templates for contact page.- Contact Page Top Map
- Contact Page Bottom Map
- Enter some text contents.
- Publish the page once it is ready.
- After publishing you need to add the newly created page in menu from WordPress Admin > Appearance > Menus
Empty pages
Some of the predefined pages are empty. Most of them are used as category listing pages or home page and all the logic is behind editor ... which means they should stay empty. These pages are:
- Home -> this page uses Homepage Template
- All Courses -> this page uses Courses Page Template
- All Teachers -> this page uses Staff Page Template
- Blog Full Width -> this page uses Blog Full Width Template
- Blog Right Sidebar -> this page uses Blog Right Sidebar Template
Homepage Widgets
Every widget is self descriptive. Just modify its contents and drag it in the area you want.
To set up Homepage widgets, go to WordPress Admin > Appearance > Widgets.
Homepage template has 1 sidebar predefined. Find below how our demo theme is configured
Homepage (sidebar) contains the following widgets
- Revolution Slider
- Kiddie Circles Widget
- Kiddie Staff Widget
- Kiddie Courses Widget
- Kiddie Testimonials Widget
- Kiddie Numbers Widget
- Kiddie Category Widget
- Kiddie Contact Widget
If you want to follow demo site your widgets admin area should look like below.

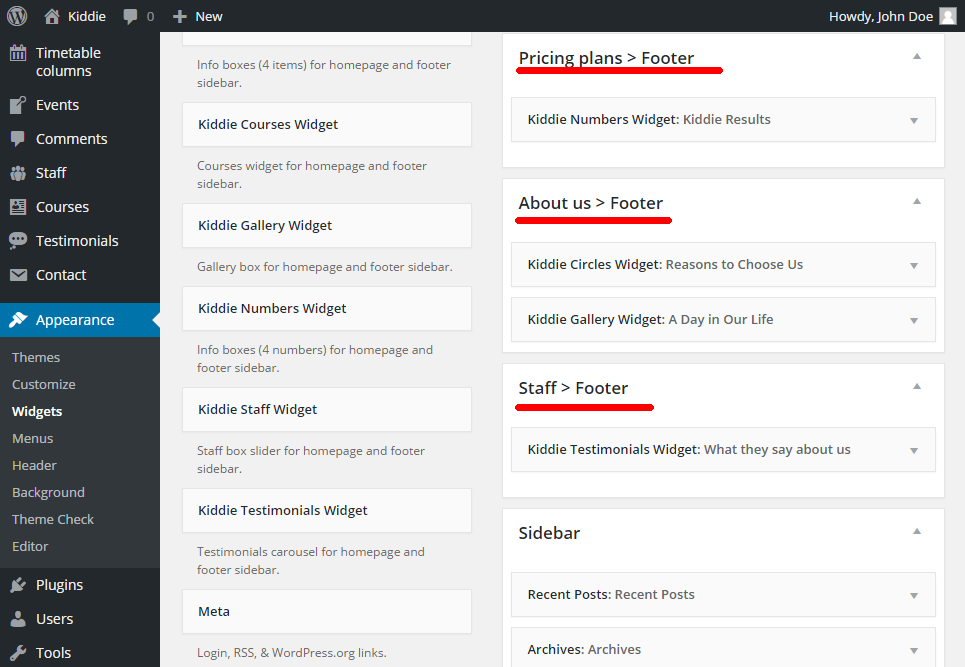
Other Pages Widgets
Every widget is self descriptive. Just modify its contents and drag it in the area you want.
Other sidebar areas predefined are on the following pages:
- Staff Listing Page -> Above Footer
- Pricing Plans Page -> Above Footer
- About Us Page -> Above Footer
We use to add on this pages widgets like: Kiddie Testimonials, Kiddie Circles, Kiddie Gallery
If you want to follow demo site your widgets admin area should look like below.
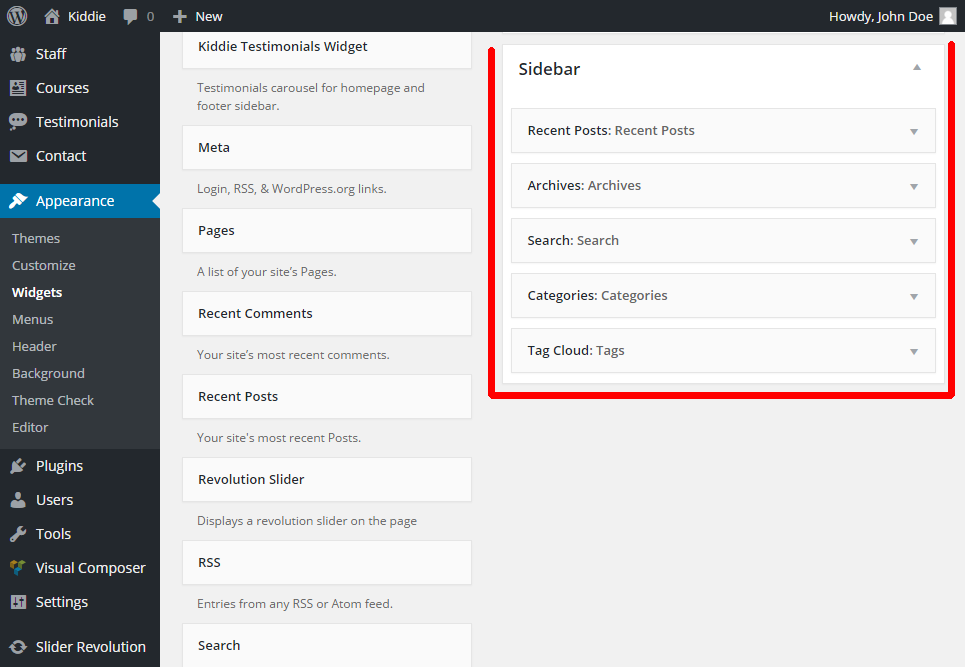
Sidebar Right Widgets
Every widget is self descriptive. Just modify its contents and drag it in the area you want.
The right sidebar can contain common WordPress Widgets
We use in this sidebar widgets like:
- Recent Posts
- Archive
- Search
- Categories
- Tags
- Menu
- Calendar
- Last Comments
If you want to follow demo site your widgets admin area should look like below.
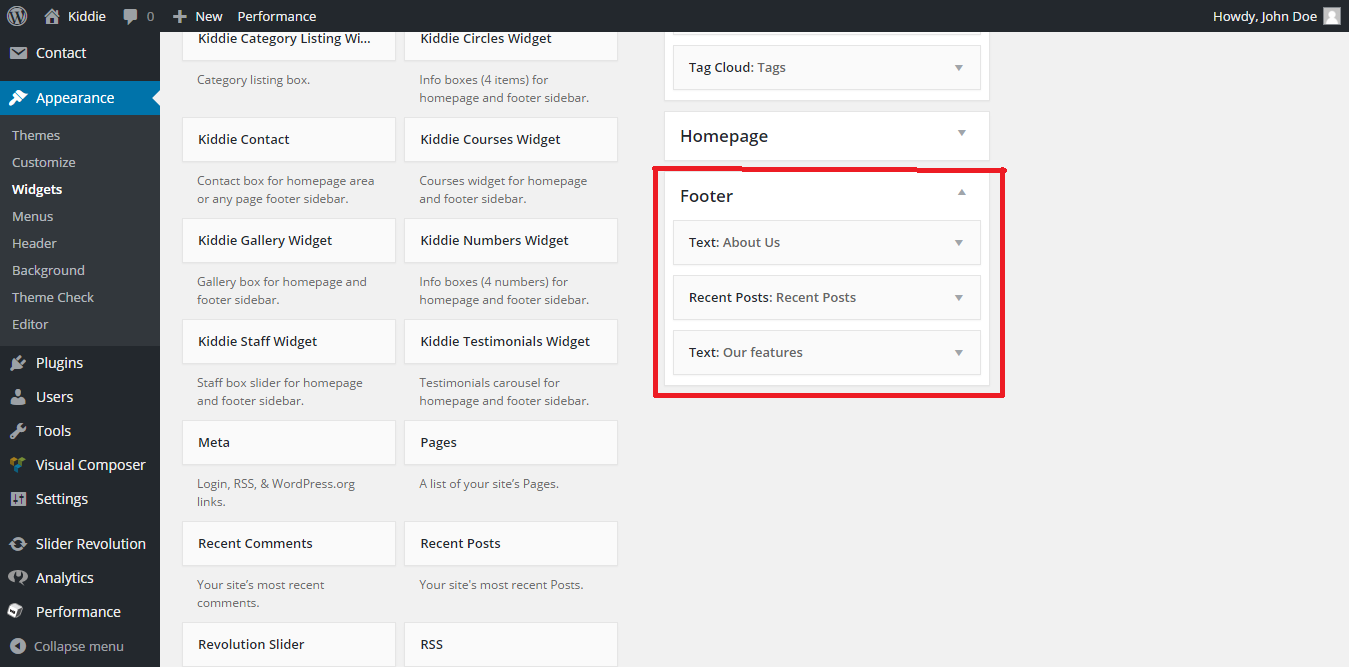
Footer Widgets
Every widget is self descriptive. Just modify its contents and drag it in the footer sidebar area.
Footer sidebar can contain common WordPress Widgets. Please note that the footer sidebar is divided in three columns.
We use in this sidebar widgets like:
- Recent Posts
- Archive
- Search
- Categories
- Tags
- Menu
- Calendar
- Last Comments
If you want to follow demo site your widgets admin area should look like below.
Our Demo Text Widgets Content
About UsFont Icons
You may use any of the icon fonts below in any context of this theme. They are already loaded as font. Icons below are used in different contexts like: menu icons, post icons, list bullets etc.
Set Up Menu Icons
If you want to change menu icons go to Appearance > Menu. From screen option make sure you have checked the CSS Classes checkbox.
On every top item you can set an font icon. You can choose from the previous Font Icons List (Flaticon) or from Font Awesome.
Always keep the classes in the green rectangle and change only the last class with the one you want.

Translating The Theme
This theme is translation ready but the support of RTL languages is not available for now.- For translation to only one language please provide the POT files to your translators. Once they are ready you should get back a PO/MO file. Use them in the child theme and replace the PO/MO files there with the new ones. This way you are safe when your theme is updated and your translation files remains untouched in child theme folder even if the theme is updated.
- For translation to multiple languages you can use WPML Plugin
Quick Modify CSS
You can make quick CSS changes in the Admin > Appearance > Customize > Custom Code

Hire Customization Services
If you need some additional features or want modification in existing theme features then you can contact theme customization service providers like http://psdtohtmlwp.com/ or https://codeable.io/ or http://werkpress.com/